BootMii 복원
이 가이드에서는 BootMii를 사용하여 낸드 백업을 복원하는 방법에 대한 지침을 제공합니다.
Please read the information below before proceeding further.
INFO
Important Information
Family Edition Wiis and Wii minis CANNOT restore NAND backups. 이는 boot2가 아닌 Wii에 복원 확인 코드를 입력하는 데 필요한 게임큐브 포트가 없기 때문입니다. For additional help, please seek support on the Nintendo Homebrew discord server.
BootMii를 boot2로 설치한 경우 콘솔을 다시 시작하여 BootMii를 실행해야 합니다. 이 경우 1 단계와 2 단계를 건너뜁니다.
If you have not done anything to cause a brick (or you're starting up your Wii after a long time), then it is likely a Wi-Fi Brick.
If you were restoring a NAND backup in order to repair a brick and this did not fix your issue, please consult the bricks portion of this guide to locate your issue.
You must use the buttons on your console or a GameCube controller plugged into port 1 to navigate BootMii. To navigate with a GameCube controller, click left/right on the +Control Pad to move, and press A to select. To navigate with your console buttons, press
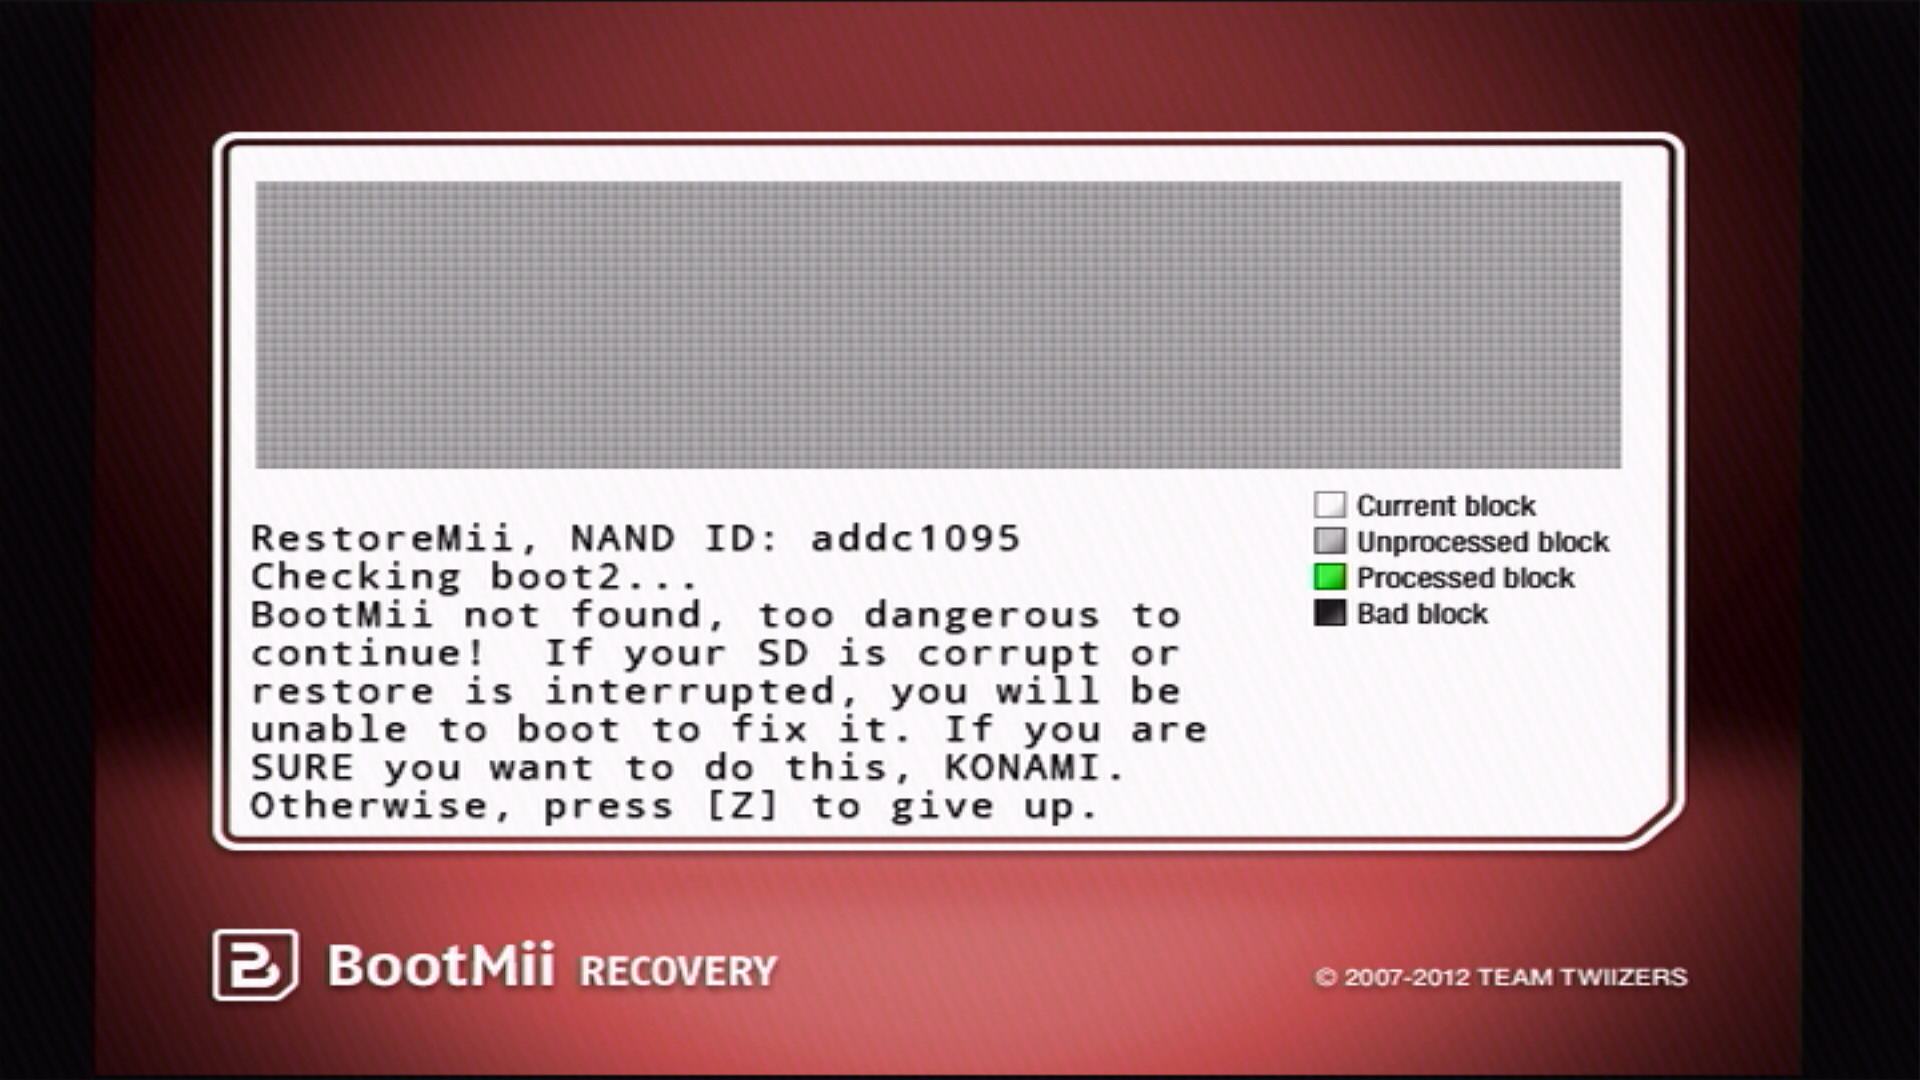
POWERto move right, and pressRESETto select.BootMii가 IOS로 설치된 경우 RestoreMii는 게임큐브 컨트롤러를 통해 코나미 코드를 입력하라는 메시지를 표시합니다. This is explained in Step 6.
DANGER
Important Warnings
This is intended to be a last resort method of repairing an issue on your Wii. Please verify that you can enter the Homebrew Channel before restoring a backup, as most issues can be resolved from here. Please additionally join Nintendo Homebrew discord server for help with diagnosing and resolving your issue in conjunction with the bricks guide.
화면이 검은색으로 유지되고 파란색 디스크 드라이브 표시등이 깜박이면 SD 카드에 BootMii 파일이 누락된 것입니다. 이 zip 파일을 다운로드하고 SD 카드의 루트에 압축 해제한 다음 다시 시도하세요.
DO NOT restore an unverified NAND backup, or a NAND backup that is not from your Wii. This may lead to a WORSE BRICK. The same goes for restoring backups off of faulty SD cards.
낸드 백업에서 개별 데이터 복원
If you would like to restore individual data from your NAND backup, a much safer and faster way to do this using Dolphin Emulator.
예를 들어, Wii 메시지 보드 데이터를 복원하려면 돌핀을 사용하여 낸드 백업을 가져옵니다. In Dolphin, go to File -> Open User Folder, and find Wii/title/00000001/00000002/data/cdb.vff, copy it to your SD card, and use WiiXplorer to restore it in the corresponding location.
If you want to restore a game's save data, use Dolphin to import your NAND backup, use Tools -> Export All Wii Saves to export all your saves to your SD card, and use Data Management to move it to your Wii.
요구 사항
- A Wii with BootMii as IOS or BootMii as boot2 installed
- An earlier NAND Backup for your specific Wii made by BootMii OR nanddumper@ios
지침
Launch the Homebrew Channel, and launch the Load Priiloader app.
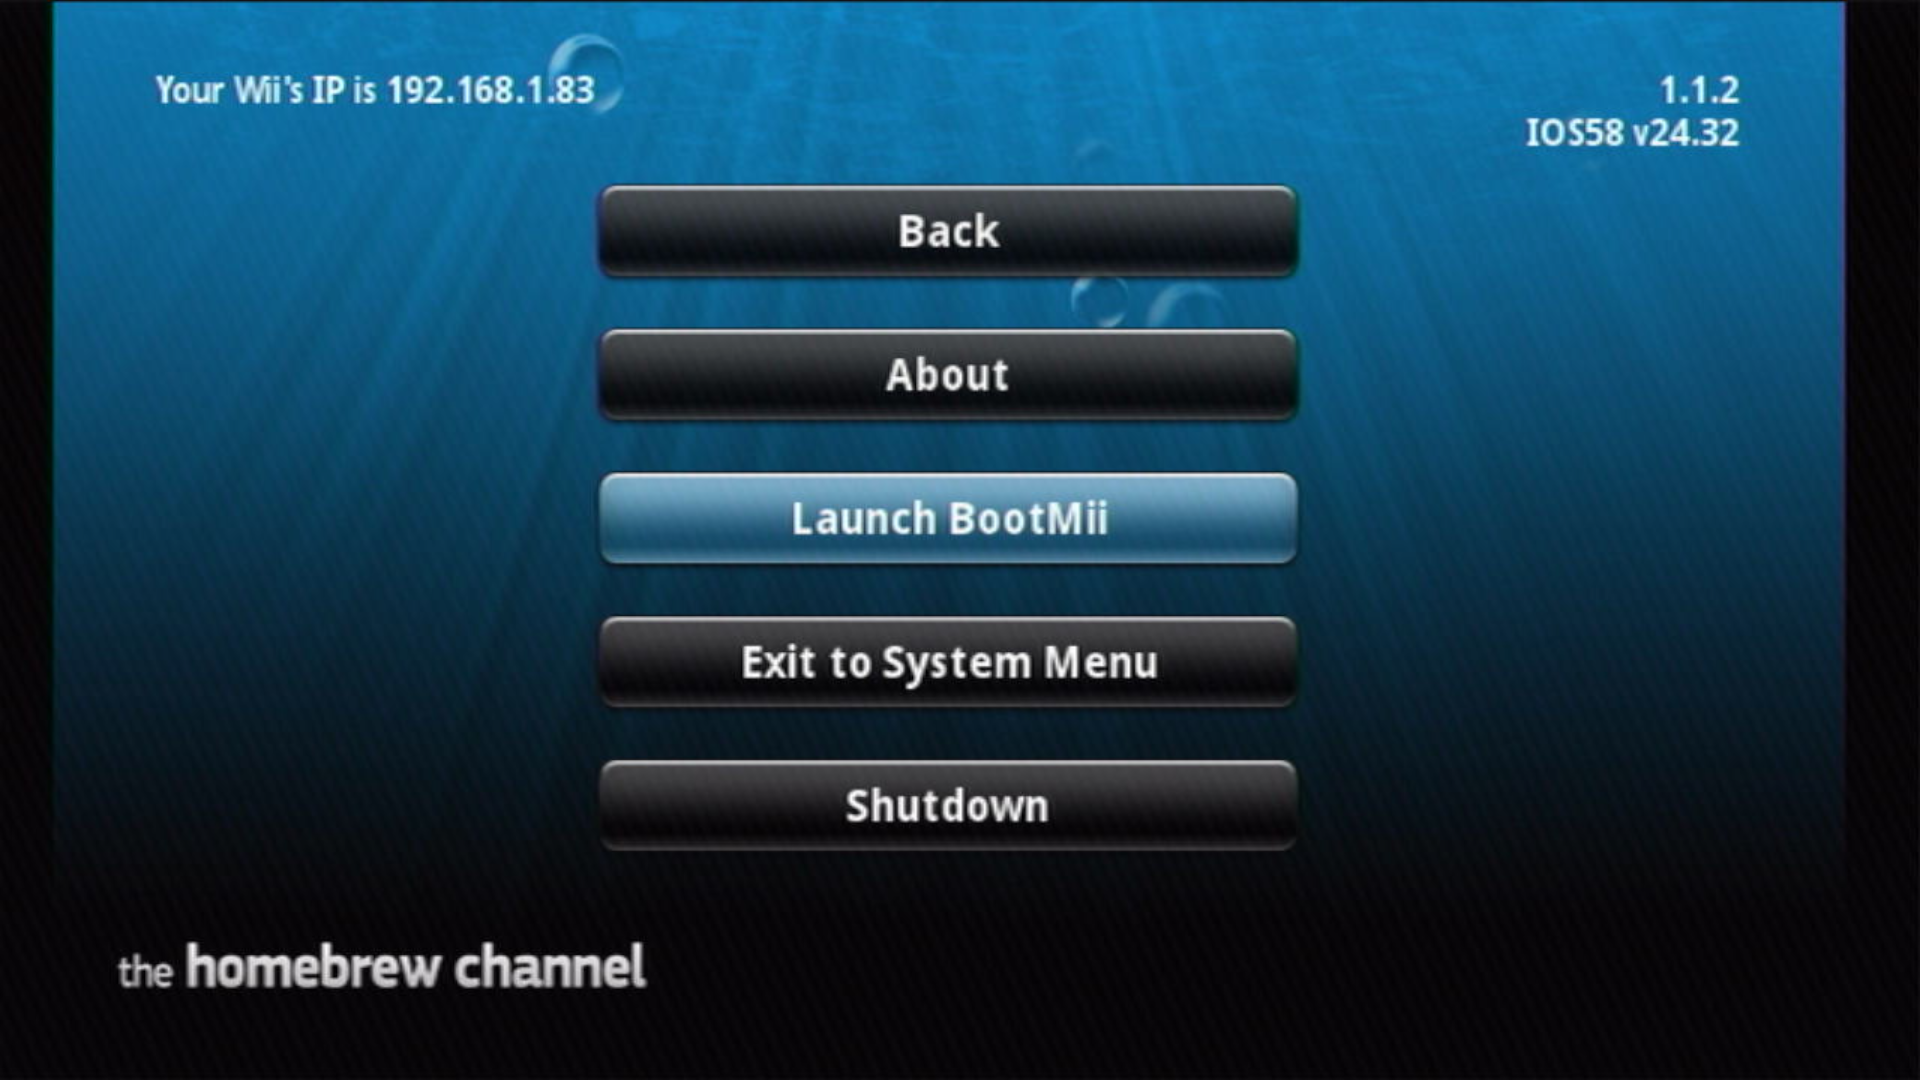
Press the HOME Button, then select "Launch BootMii".
- 홈브류 채널에 접근할 수 없고 Priiloader가 설치된 경우 부팅 시 홈브류 채널에 접근하여
BootMii IOS를 선택하여 BootMii를 로드할 수 있습니다.
- 홈브류 채널에 접근할 수 없고 Priiloader가 설치된 경우 부팅 시 홈브류 채널에 접근하여
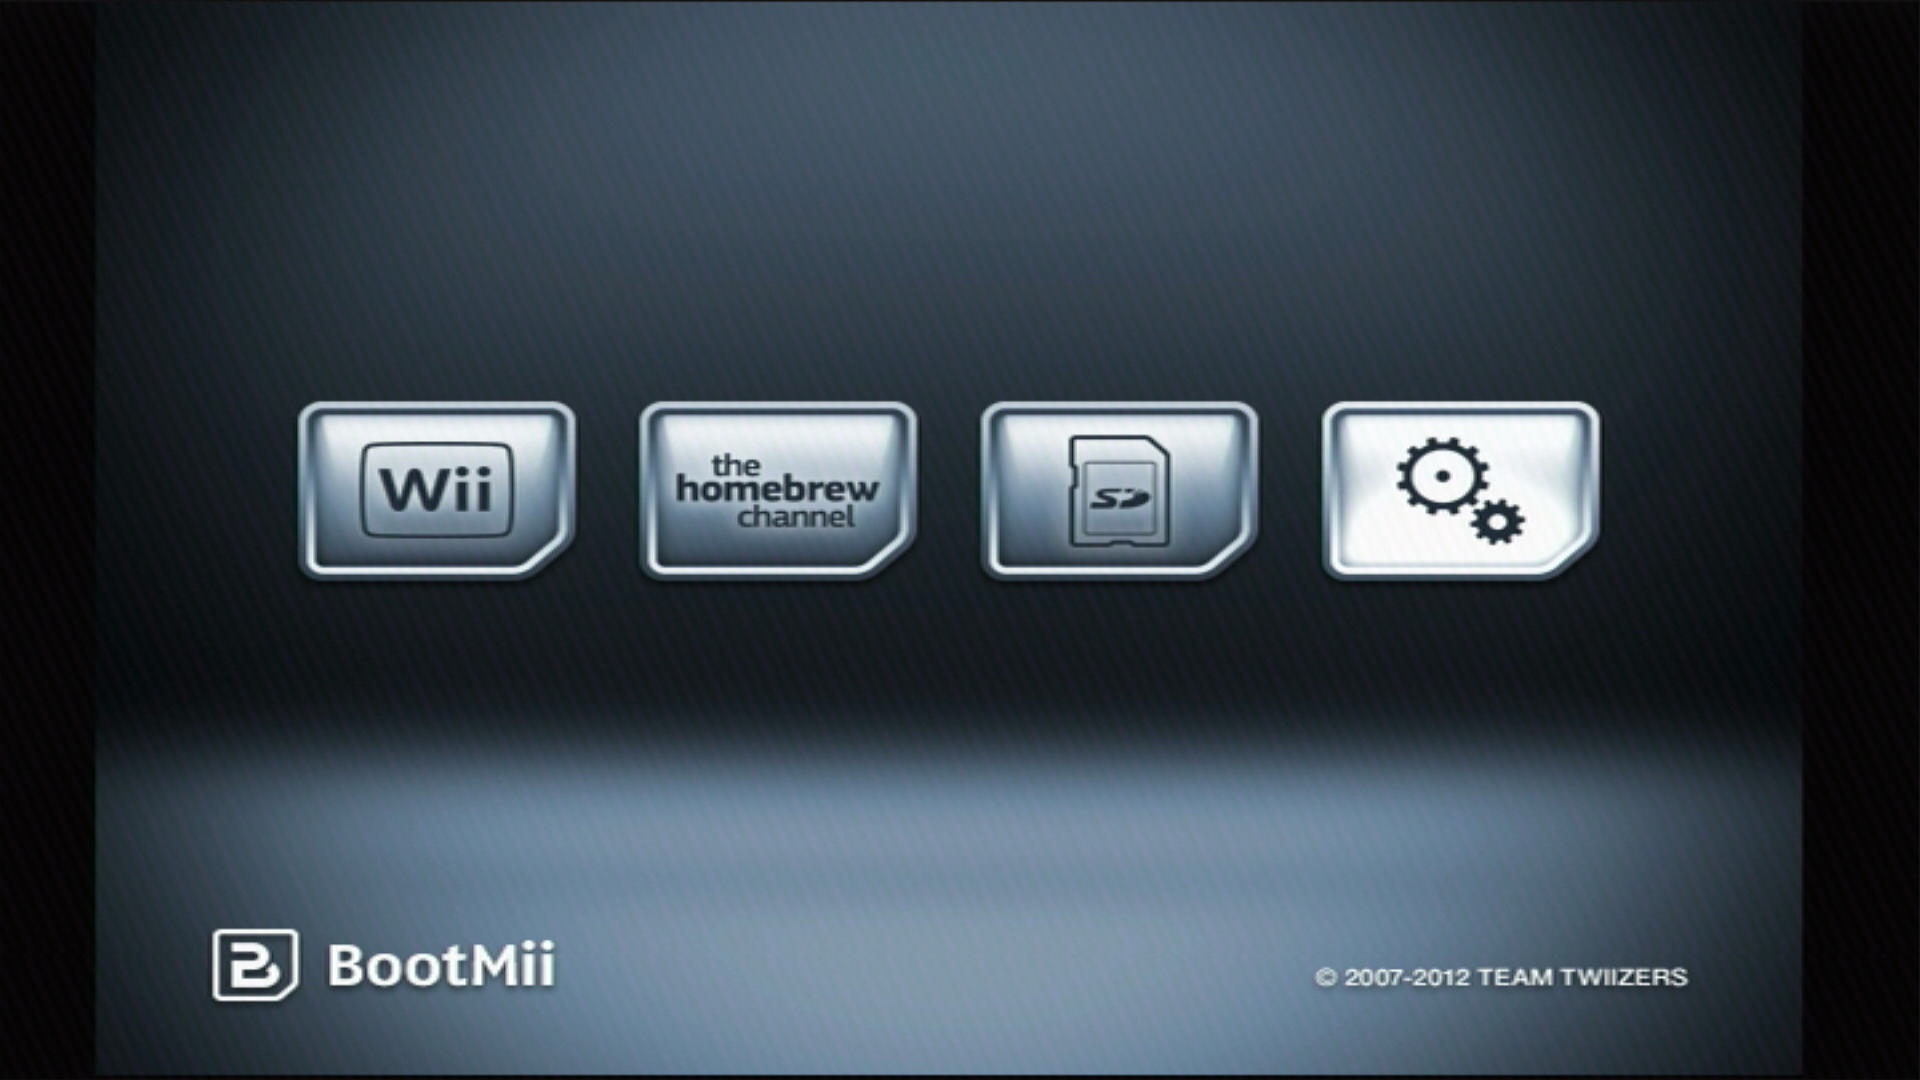
옵션 버튼 (톱니바퀴가 있는 아이콘) 을 선택합니다.
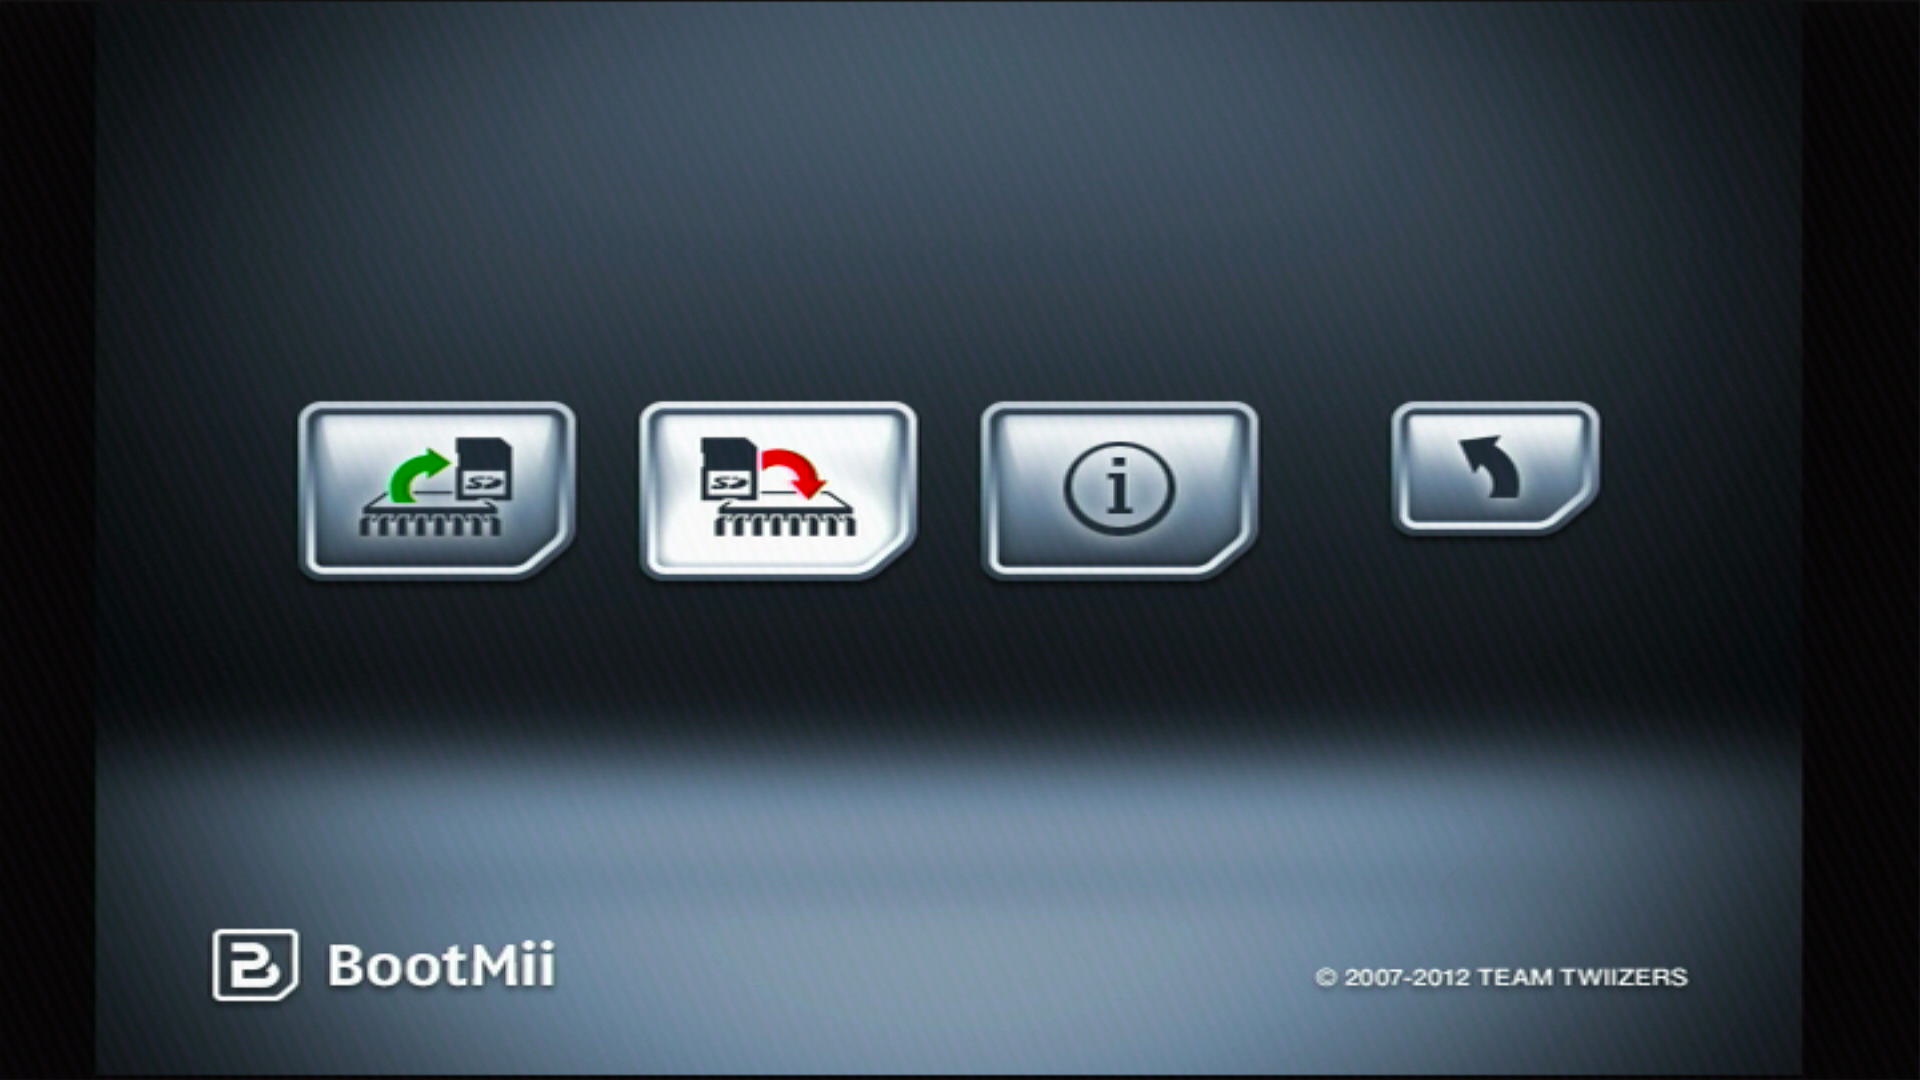
RestoreMii 버튼을 선택합니다.
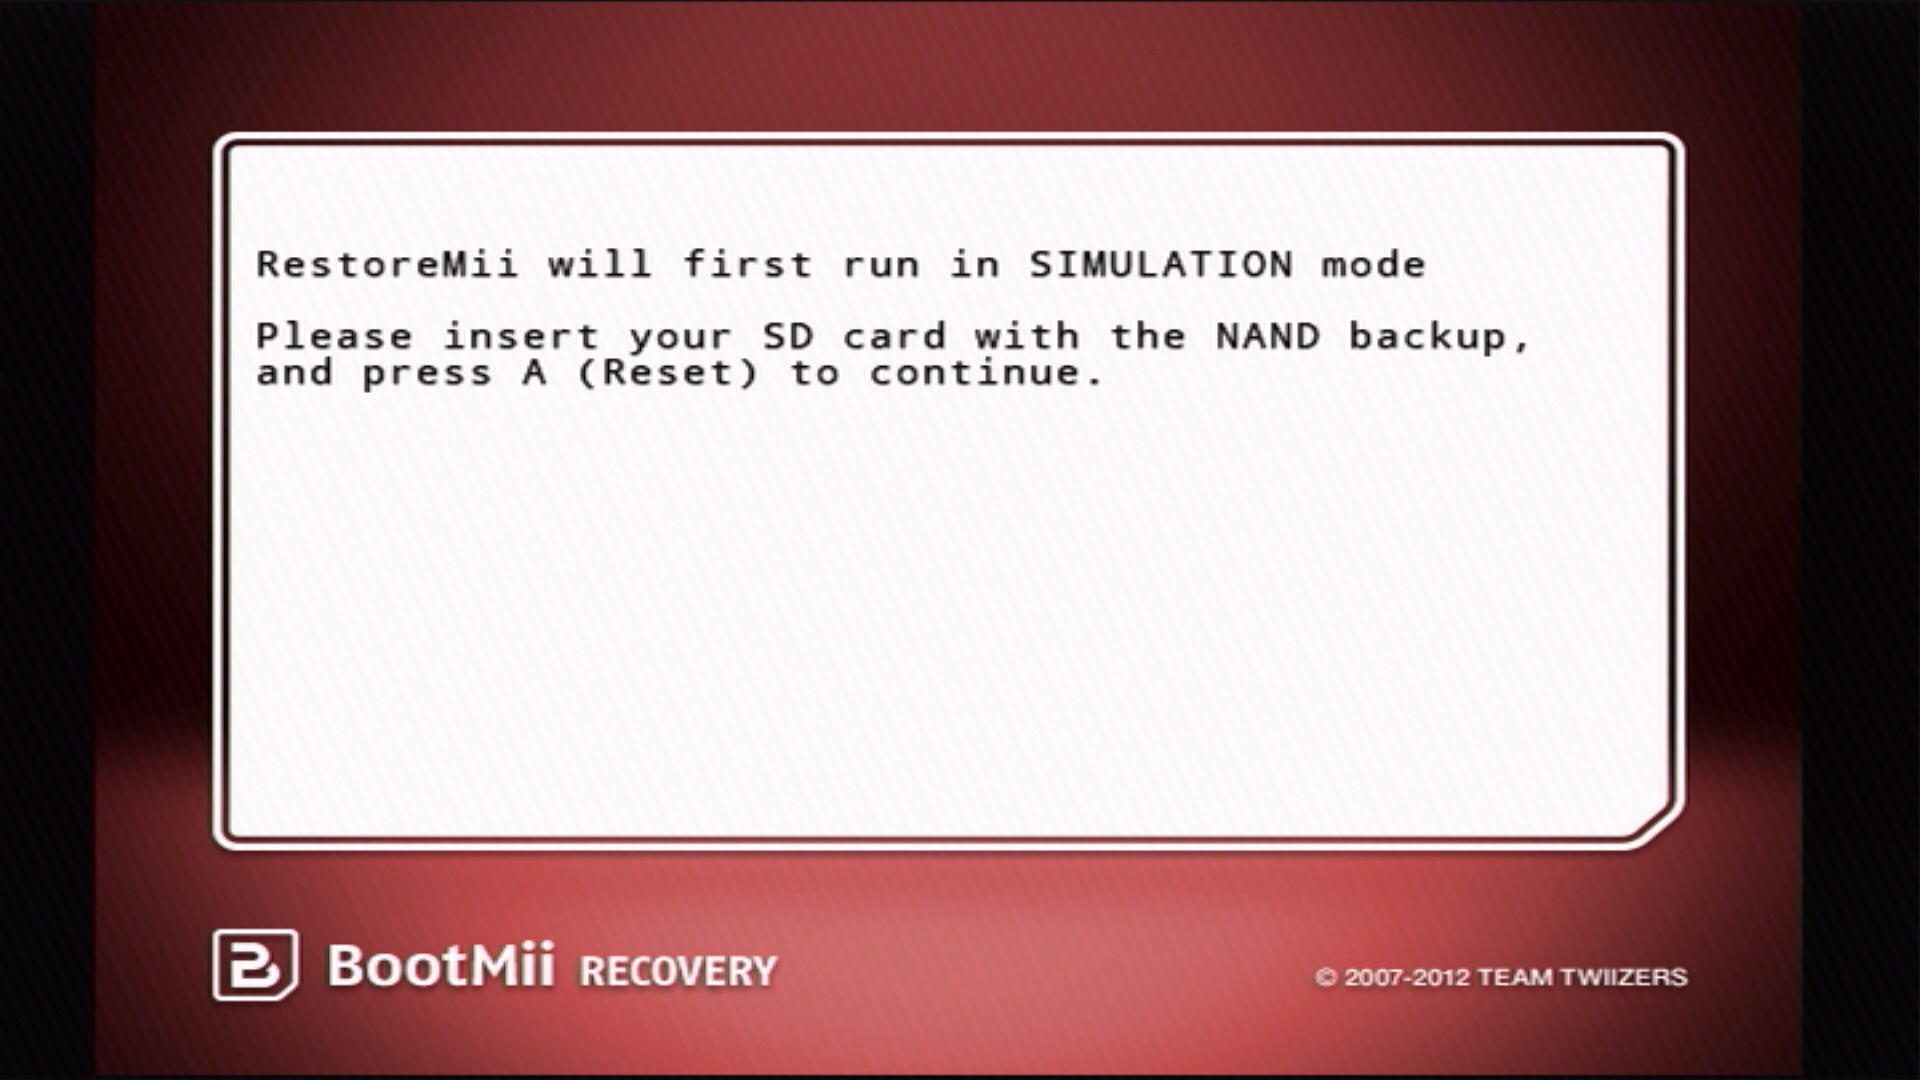
BootMii는 시뮬레이션 모드에서 실행될 것이라고 알려주며, 계속하려면 A 또는 Reset 버튼을 누르세요.
BootMii가 IOS로 설치된 경우 게임큐브 컨트롤러에 코나미 코드를 입력하세요: ↑, ↑, ↓, ↓, ←, →, ←, →, B, A, START
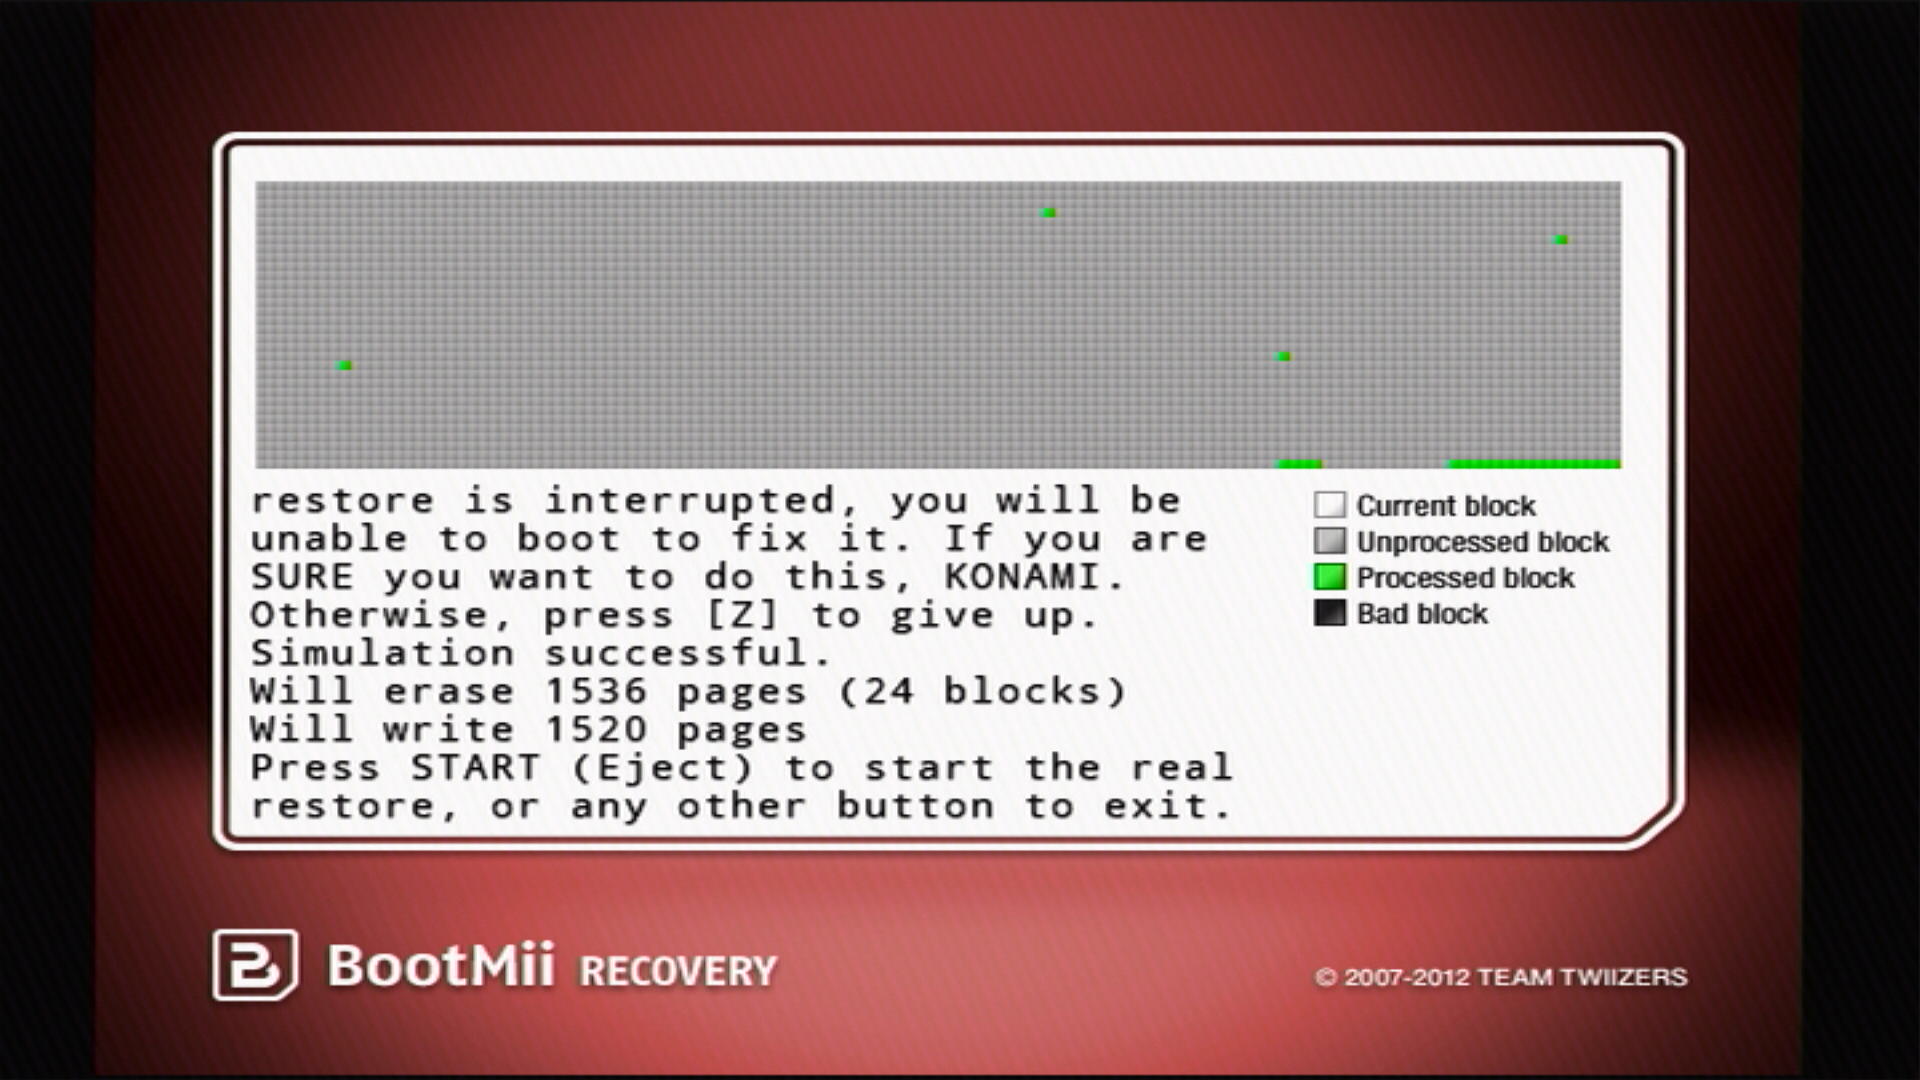
BootMii는 복원 프로세스를 시뮬레이션으로 실행하여 무엇이 지워지고 다시 쓰여질지 자세히 설명합니다. 이 작업이 완료되면 복원 과정에서 빠져나올 수 있는 마지막 기회가 주어집니다. 그렇지 않은 경우 START 또는 Eject 버튼을 눌러 시작합니다.
복구가 끝나면
I HAZ SUCCESS!라는 텍스트가 표시되고, 그렇지 않으면I HAZ FAIL라는 텍스트가 표시됩니다. Wii 콘솔이나 게임큐브 컨트롤러에서 아무 버튼이나 누릅니다.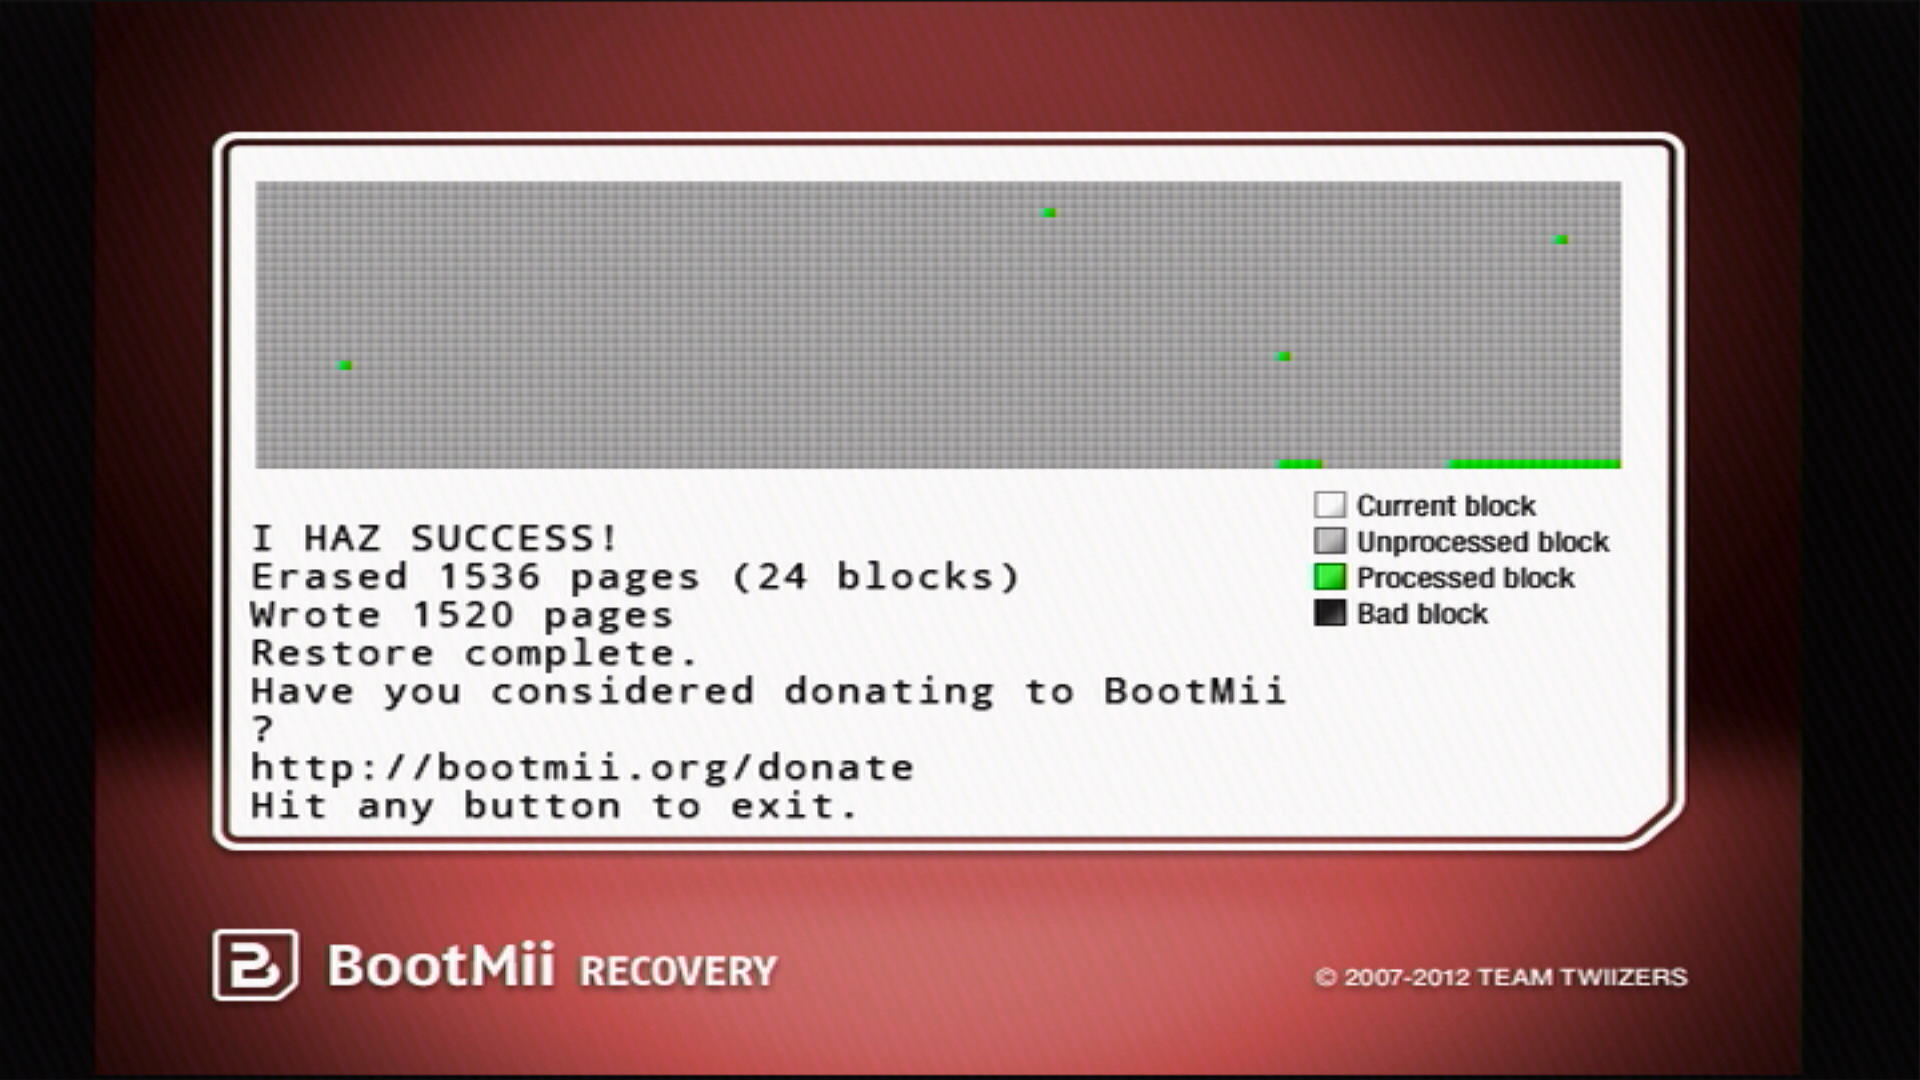
BootMii를 종료하려면 뒤로 버튼 (화살표가 있는 버튼) 을 누른 다음 Wii 메뉴 버튼 또는 홈브류 채널 버튼을 눌러 원하는 위치에서 종료할 수 있습니다.
