Creating a NAND Backup (Wii)
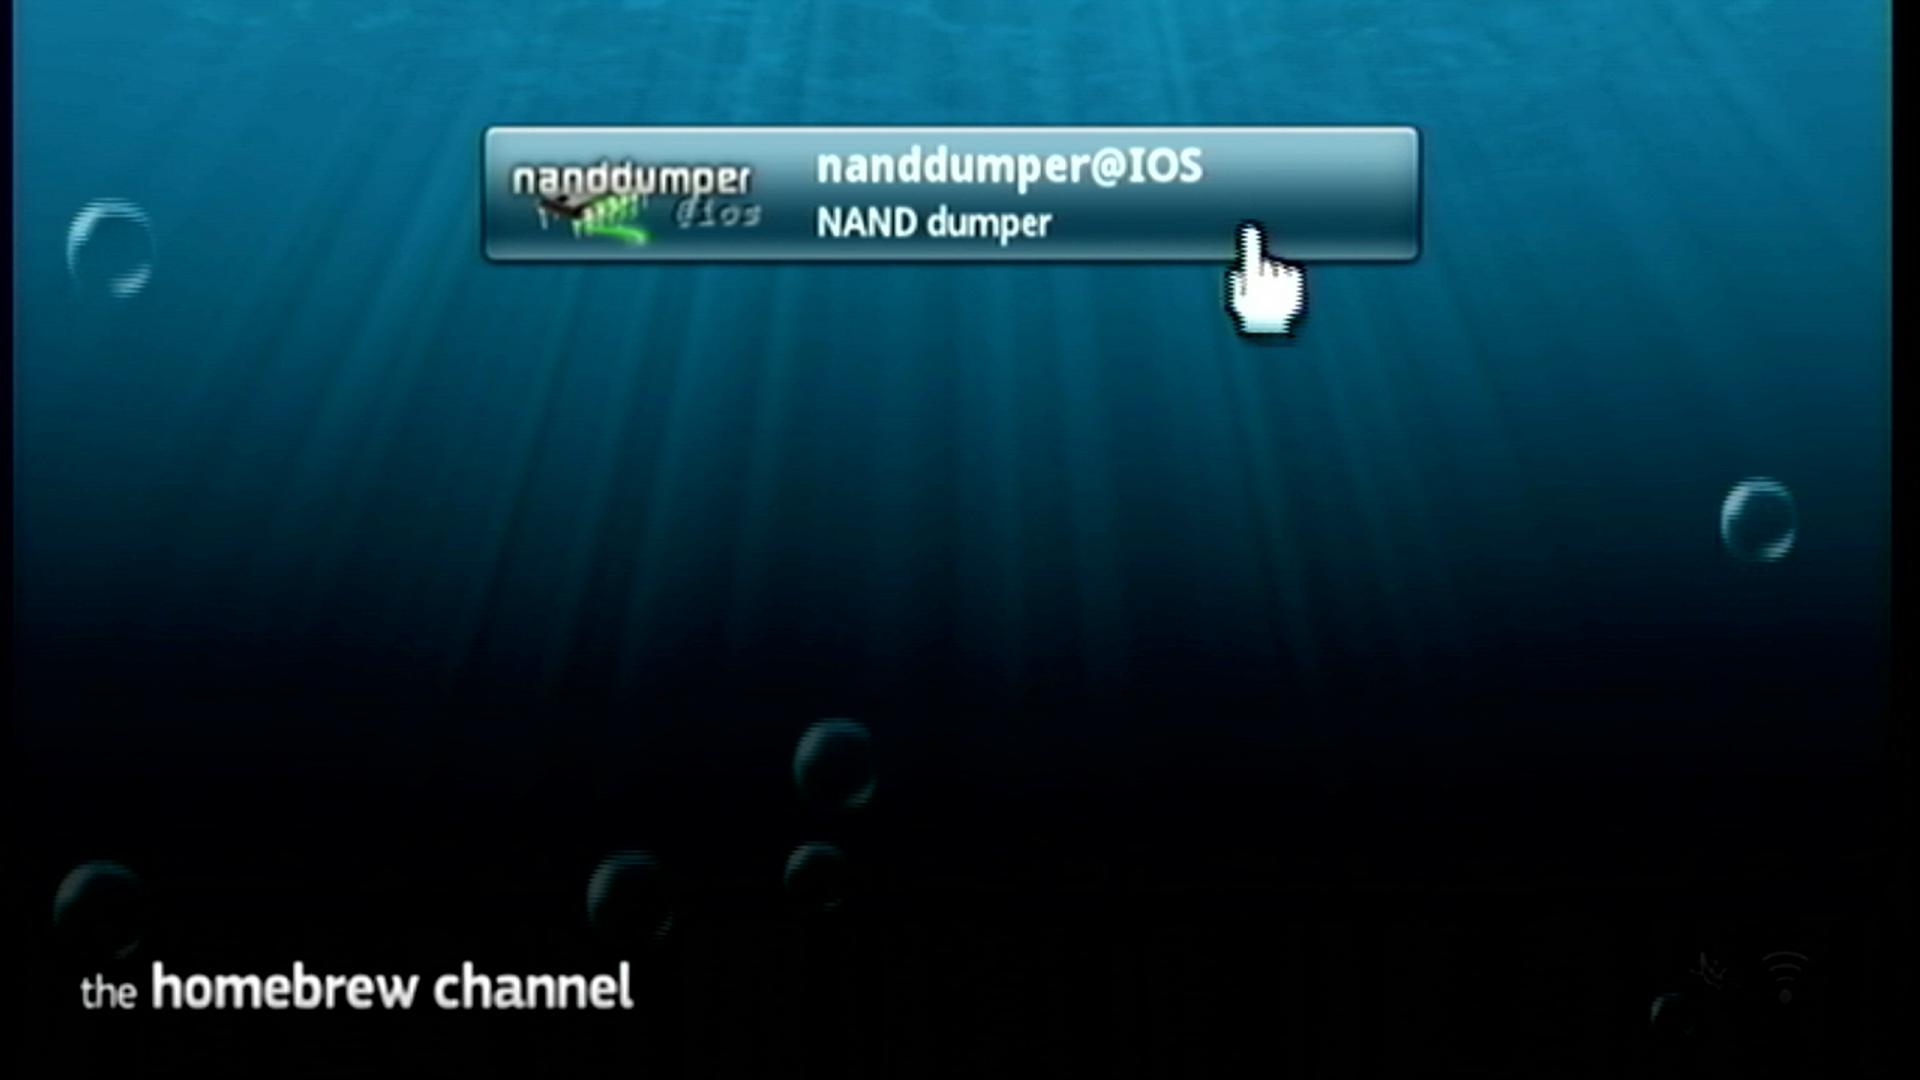
In order to protect your Wii from permanant bricks, this guide will instruct you on how to create a NAND backup. Most users will want to select nanddumper@ios, with BootMii as a backup option for users that can use an SD card.
Importing NAND Backup to Dolphin Emulator
Your NAND backup can be utilized in Dolphin Emulator, if you choose to do so.
- Get the latest release of Dolphin Emulator from the Dolphin Website and install it to your device.
- Open Dolphin Emulator.
- Click on the
Toolstab, scroll down toManage NAND, then selectImport BootMii NAND backup.... - Locate the
nand.binfound on the root of your SD card and select Open. - If it asks for a
keys.bin, locate it on the root of your SD and select Open.
Note that you will need to rename your NAND dump to the files above if you used nanddumper@ios, as described in the below section.
On Wii consoles with a usable USB port or SD card slot, nanddumper@ios allows for backing up your Wii's NAND storage. nanddumper@ios is recommended over BootMii due to its quicker speed in creating a NAND backup. This section will guide you through the process to back up your Wii's NAND, which you can then use however you like.
Please read the below information before proceeding further.
INFO
Important Information
After the completion of this guide, four files will have been created in the directory
/wii/backupson your USB drive.DATE_SERIAL_nand_XX.binis your NAND backup, andSERIAL_keys.binis the file containing your console keys.DATE_SERIAL_nand_XX.bin.sha1andsha1sums.txtrespectively are files containing checksums to verify the integrity of your backups, and will not be used in an actual NAND restoration.Please note that restoring a NAND backup is usually a last resort. With that said, you can use the BootMii Recovery guide to restore your NAND backup, where more information is provided about the risks and alternatives. You can ONLY use BootMii to restore a NAND backup if you have a usable SD card slot, as described below.
If you are a Wii mini user or DO NOT have a usable SD card slot, you will be UNABLE to restore your NAND backup without hardware modification. This is because BootMii Restore requires an SD card slot to read the NAND from.
If you DO NOT have a usable GameCube controller port, you will also be UNABLE to restore your NAND backup without hardware modification. This is because BootMii Restore requires a GameCube controller port to enter the Konami code with for consoles that do not have BootMii as boot2.
Requirements
- A USB drive or SD card formatted as FAT32, with a minimum 512MB of free space (1GB or more recommended)
- nanddumper@ios
Instructions
Download the recommended
.zipfile from the Open Shop Channel website.Extract the
appsfolder in the archive to the root of your SD card or USB drive.Insert the SD card or USB drive into your Wii, and start the Homebrew Channel. Press
1and ensure that the device you are using is selected, and then open nanddumper@ios.- If you get an Exception IOS occurred! error, simply restart your Wii and try again.
nanddumper@ios will start and dump your console keys upon opening, if they are not already on your drive. Press any button that is NOT the
HOME,START, orEJECTbuttons to begin dumping your console's NAND storage.- If you get a No storage devices are attached error, ensure that your SD card or USB drive is directly connected to your Wii. If using a USB drive, it should NOT be connected to a USB hub.
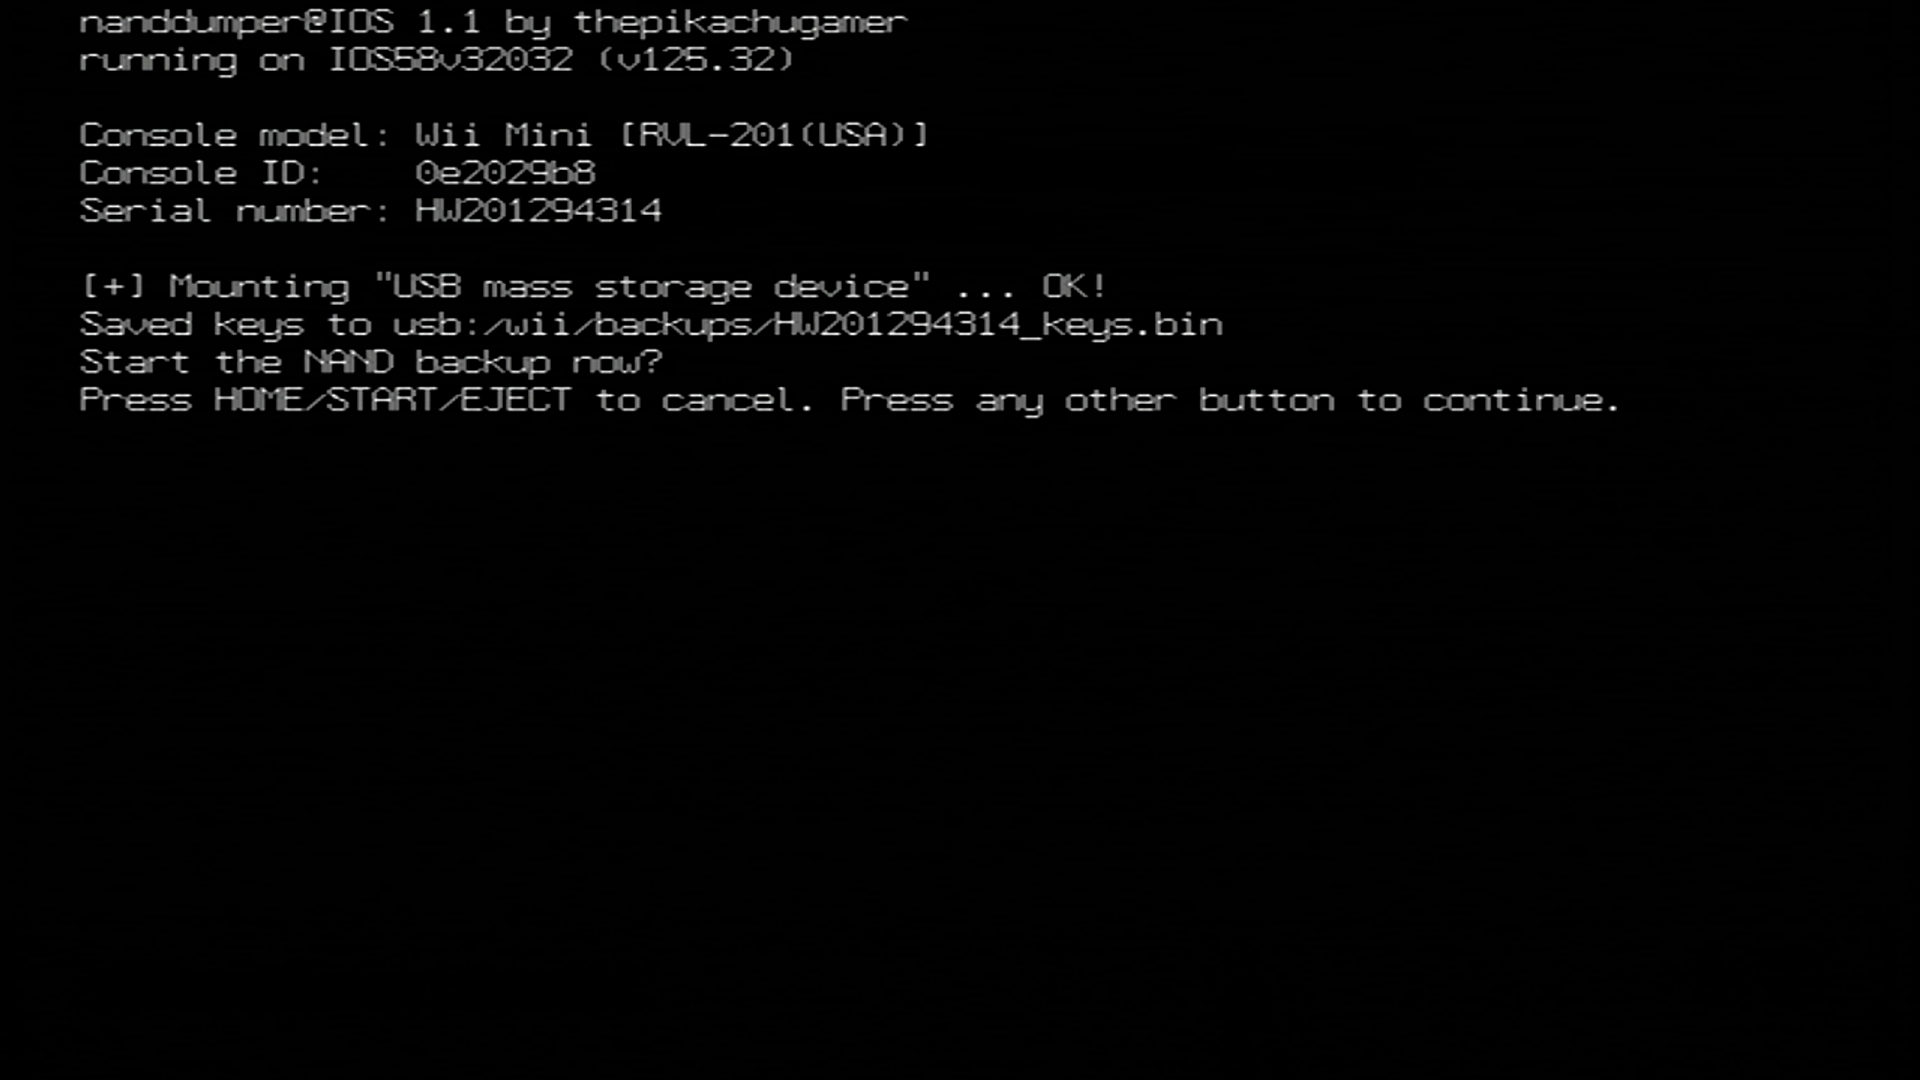
Your console's NAND will now begin dumping. Please wait for the NAND dump to finish before proceeding.
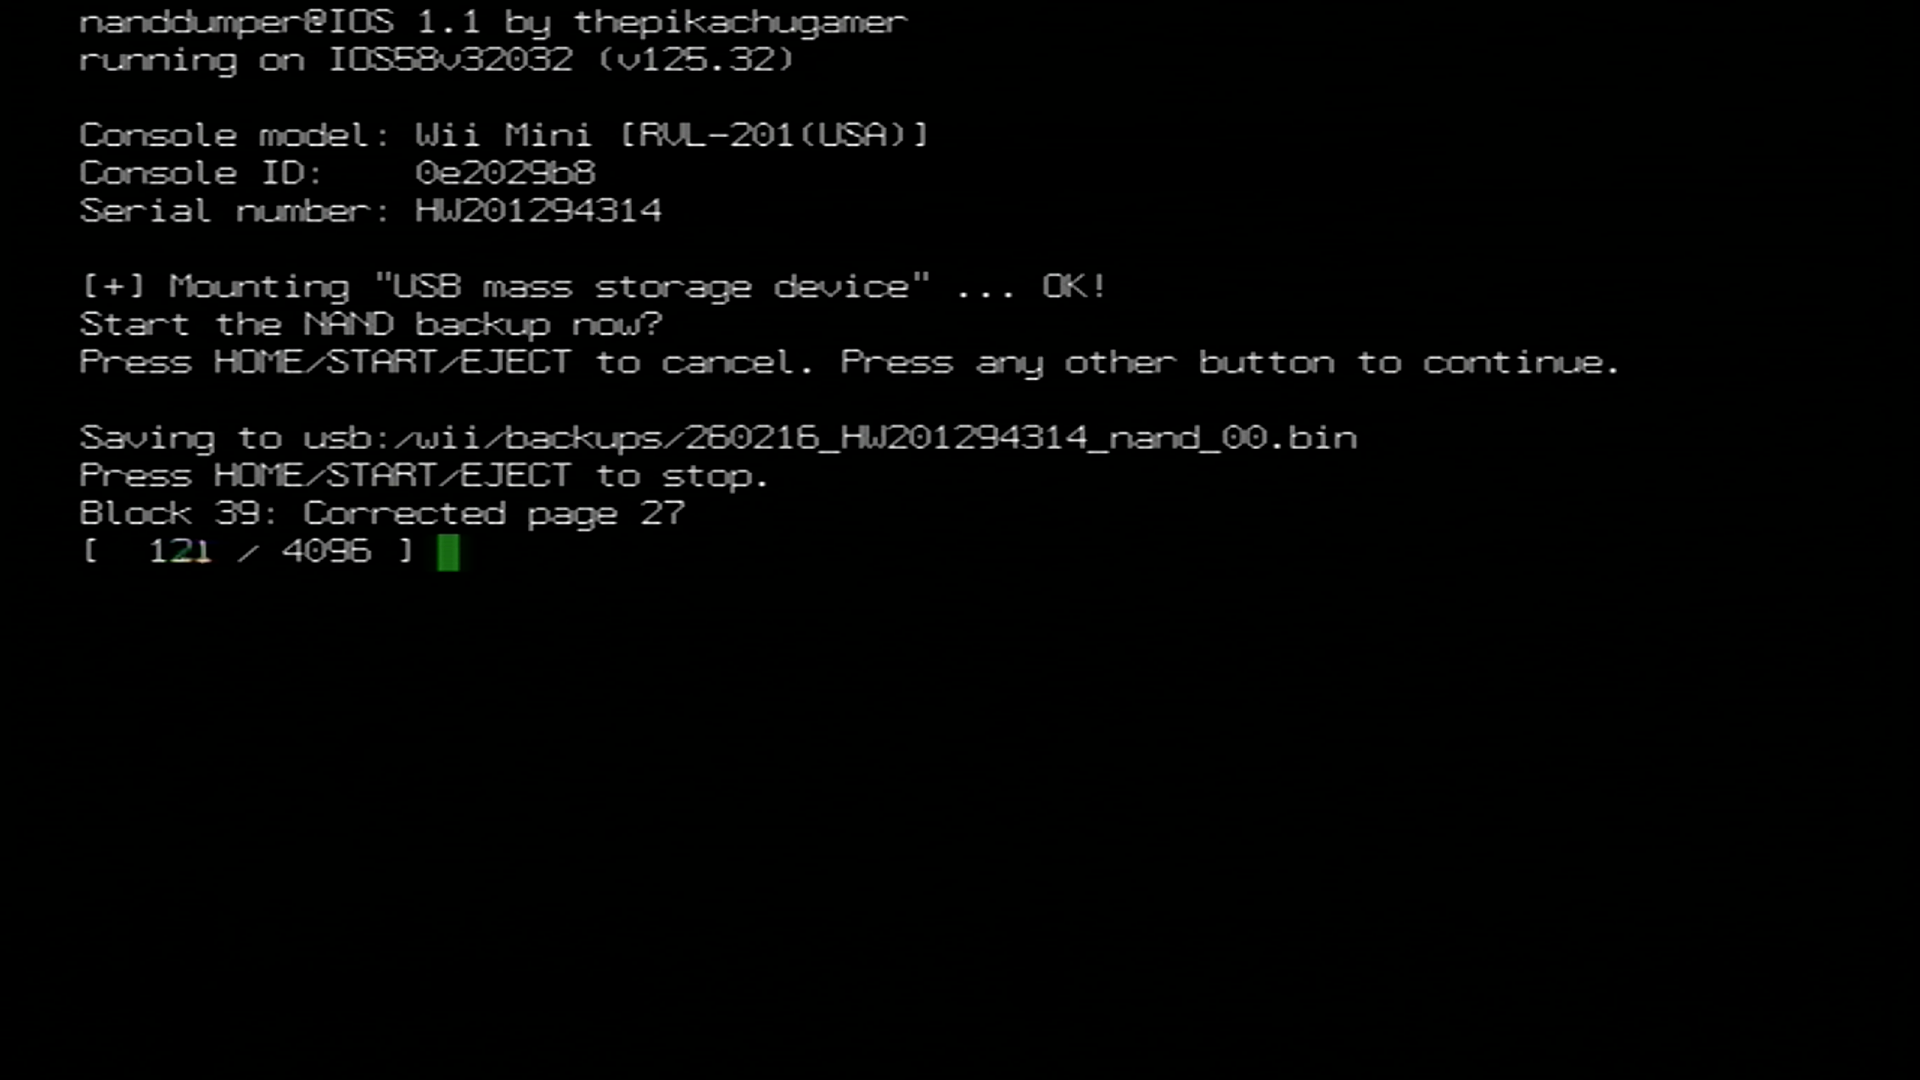
Once the NAND backup has concluded, press any button to exit nanddumper@ios. Your NAND backup and console keys will be output to your USB drive in directory
/wii/backups/.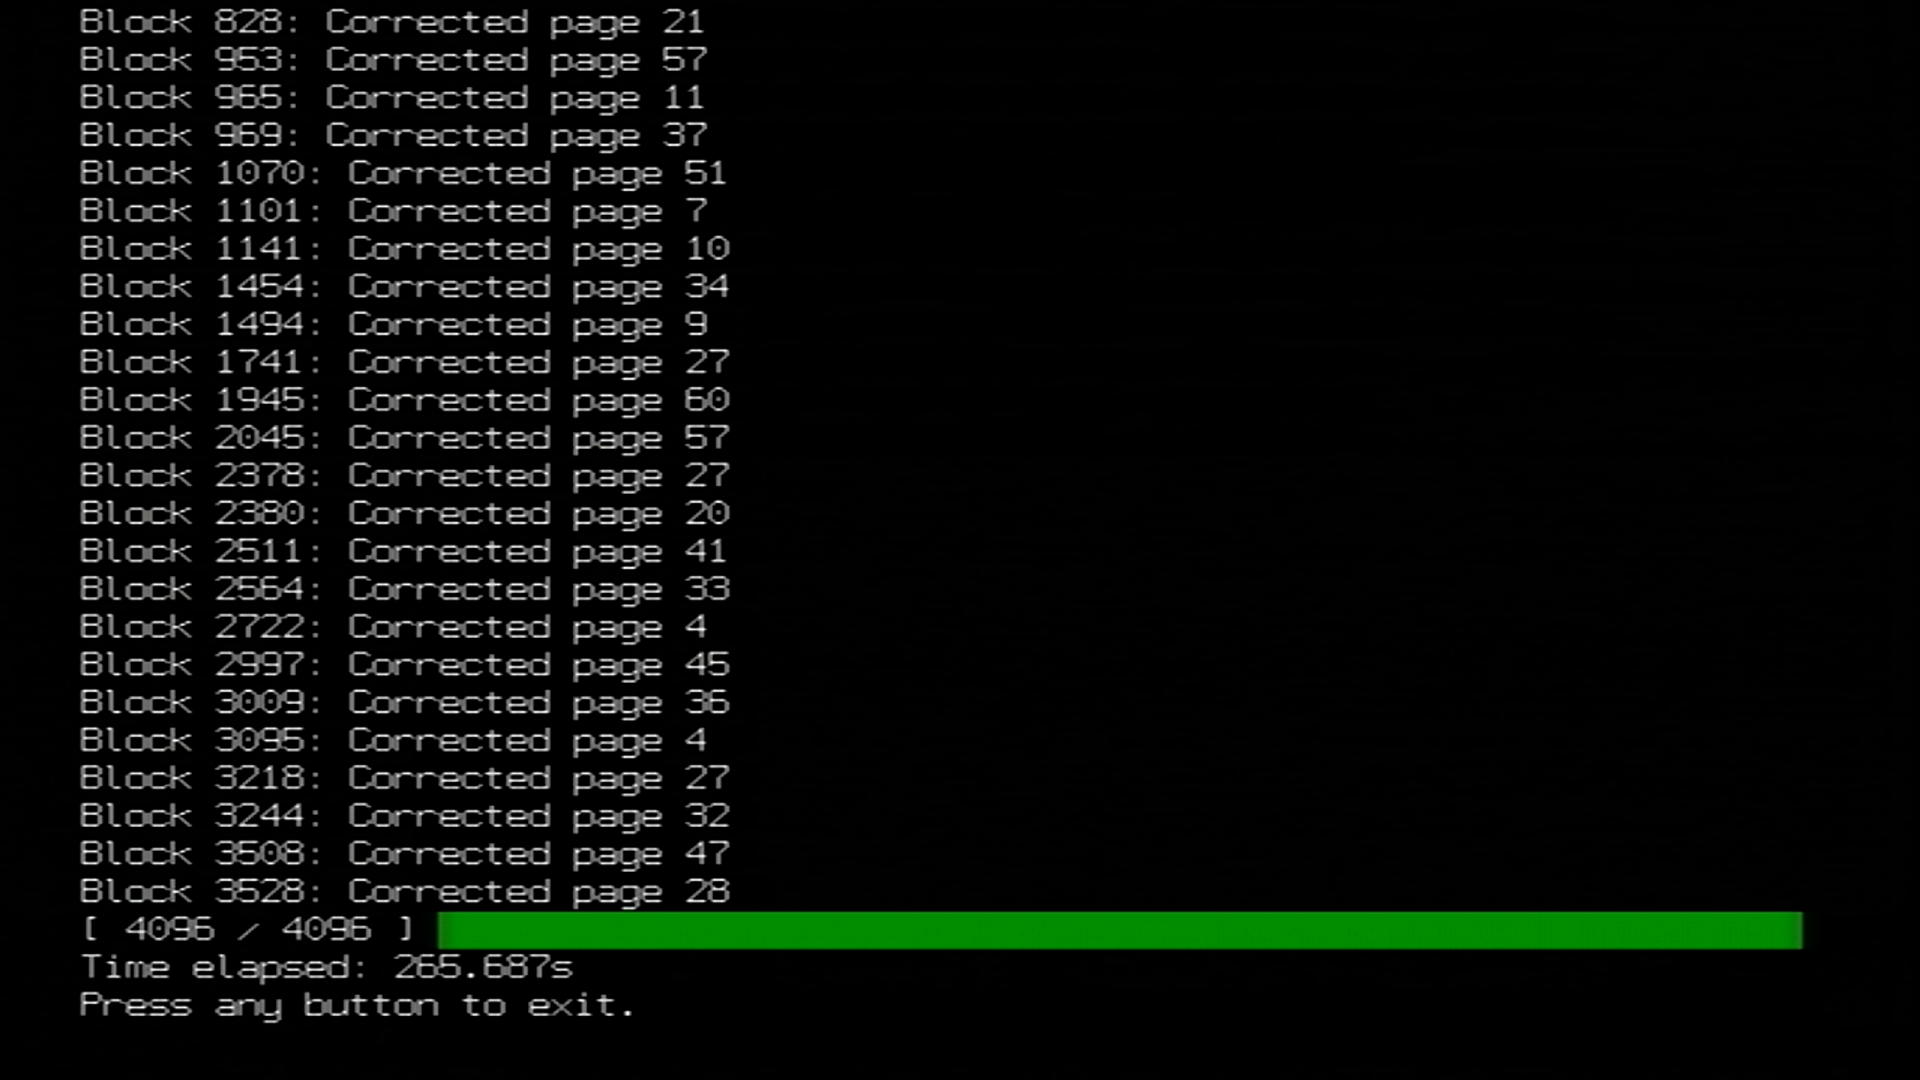
On your computer, ensure that you rename
DATE_SERIAL_nand_XX.bintonand.bin, andSERIAL_keys.bintokeys.bin. This ensures that BootMii can properly parse your NAND backup in the event that it needs to be restored.
TIP
Continue to Priiloader Installation
Priiloader adds a secondary level of brick protection, and is highly recommended even if BootMii was installed as boot2. It is especially important for users of BootMii on IOS.
If you are on Wii mini, this is your primary means of brick protection.
On Wii consoles with an SD card slot, BootMii allows for backing up and restoring your Wii's NAND storage. This section will guide you in backing up your Wii's NAND to an SD Card, which you can then use however you like.
Please read the below information before proceeding further.
INFO
Important Information
After the completion of this guide, two files will have been created on the root of your SD Card:
nand.binandkeys.bin.nand.binis a backup of your console's internal memory, whilekeys.binare your console's keys.If you have BootMii installed as boot2, you will need to launch BootMii by restarting the console. Skip steps 1 and 2 if this is the case.
You must use the buttons on your console or a GameCube controller plugged into port 1 to navigate BootMii. To navigate with a GameCube controller, click left/right on the +Control Pad to move, and press A to select. To navigate with your console buttons, press
POWERto move right, and pressRESETto select.Please note that restoring a NAND backup is usually a last resort. With that said, you can use the BootMii Recovery guide to restore your NAND backup, where more information is provided about the risks and alternatives.
Family Edition Wiis CANNOT restore NAND backups without hardware modification. This is because of the lack of GameCube ports which are required on non-boot2 Wiis to enter the restoration confirmation code.
DANGER
Important Warnings
This is intended to be a backup option, as BootMii is slower than nanddumper@ios. You need an SD card to use BootMii. If you do not have an SD card on hand right now, but instead have a usable USB drive, you can use the nanddumper@ios guide instead.
If the
Launch BootMiibutton does not appear in the Homebrew Channel, re-launch the HackMii Installer and install BootMii.If the screen stays black and the blue disc drive light is blinking upon launching BootMii, you are missing the BootMii files on your SD card. Download this zip file and extract it to the root of your SD card, then try again.
BootMii cannot be used on the Wii mini without hardware modification. Use nanddumper@ios if you are a Wii mini user.
Requirements
- An SD card with a minimum 512MB of free space (1GB or more recommended)
- BootMii
Instructions
Power on your console.
Launch the Homebrew Channel.
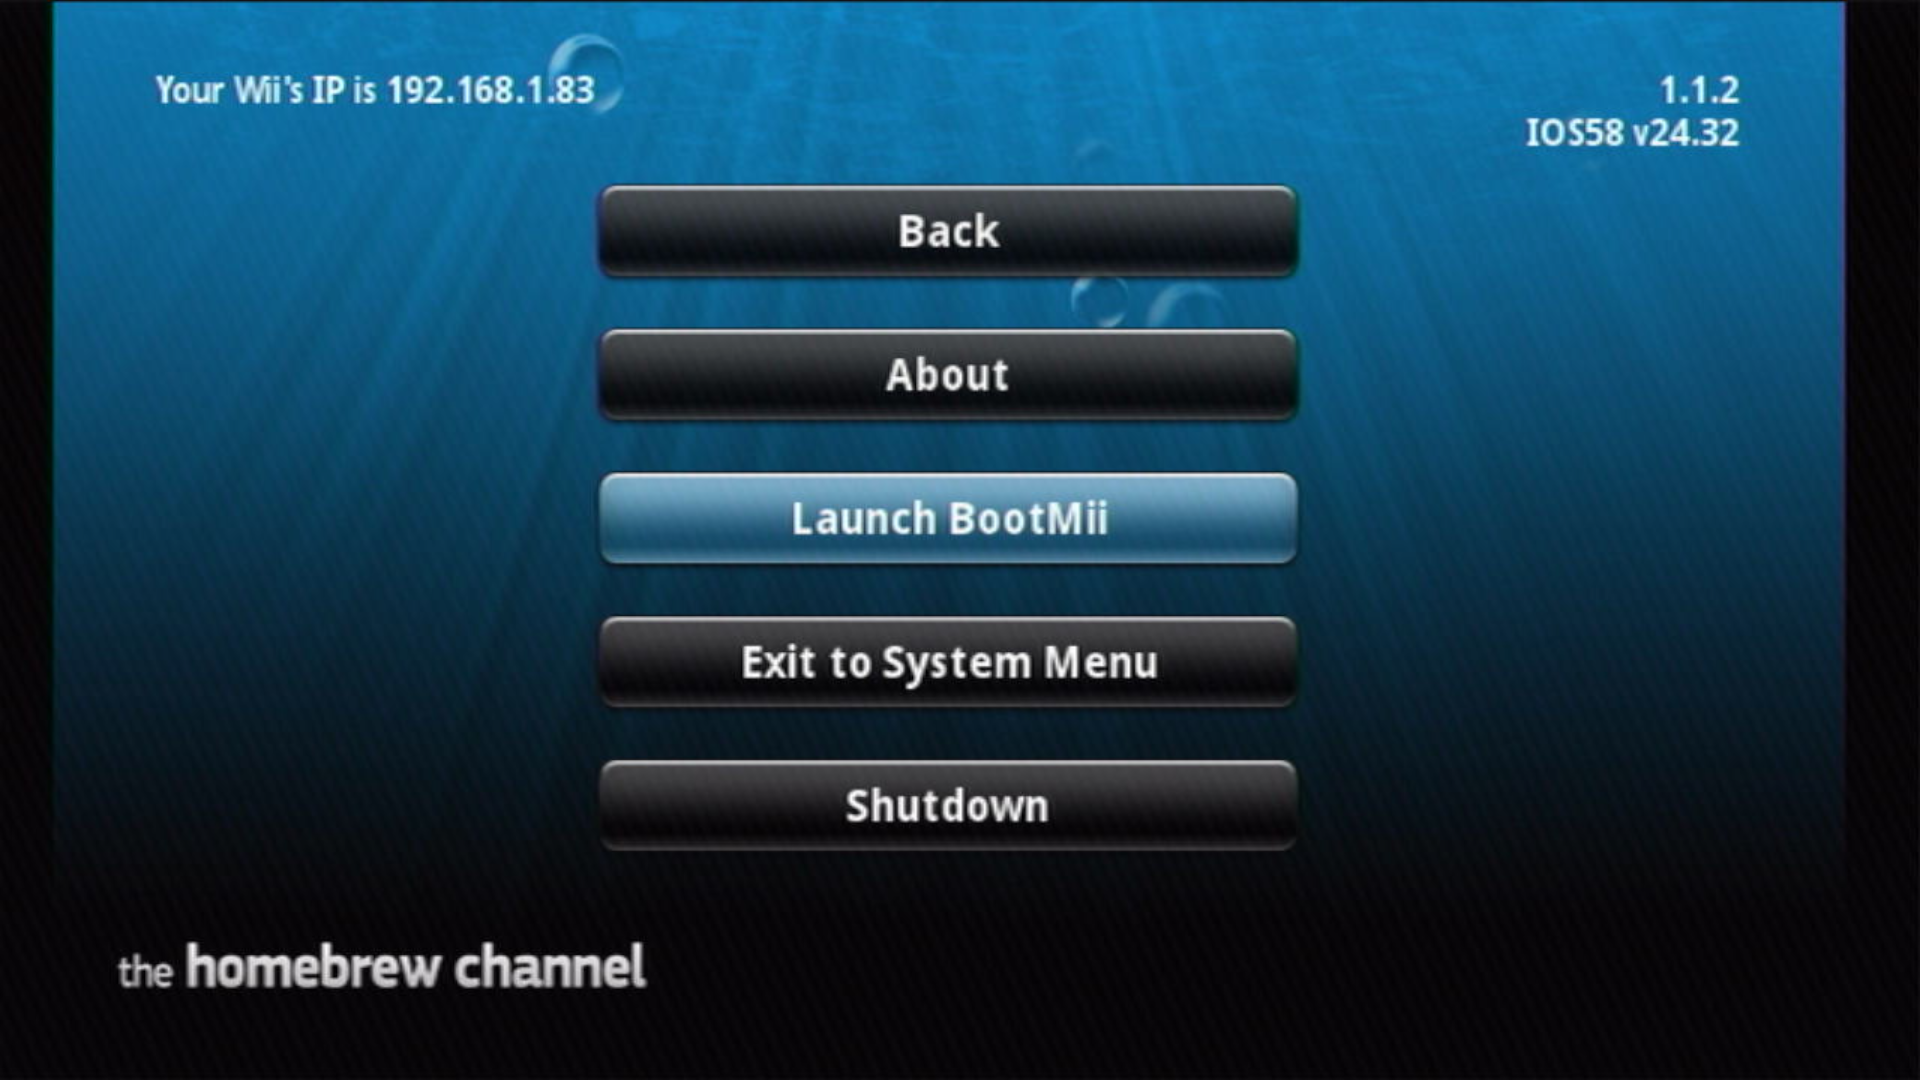
Press the HOME Button, then select "Launch BootMii".
You should see an image similar to the below now on your screen:
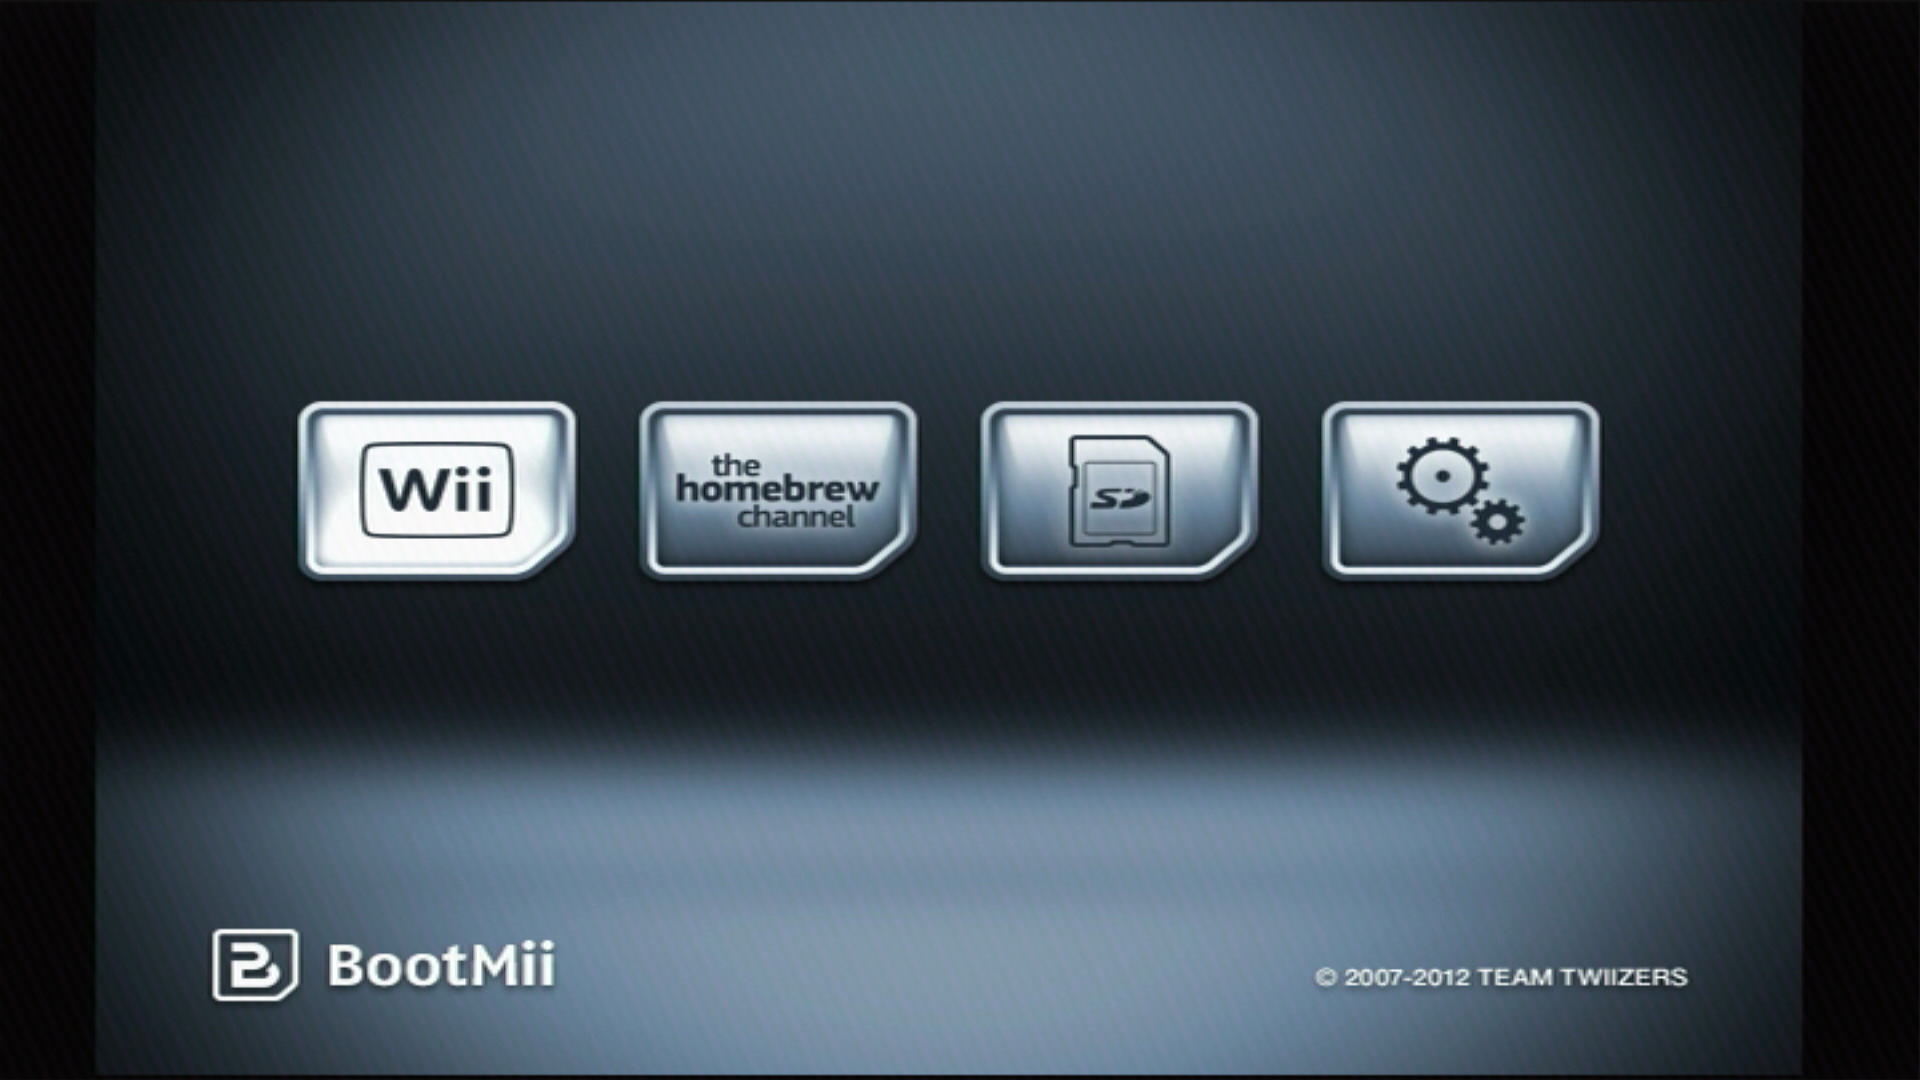
Select the Options button (the icon with the gears).
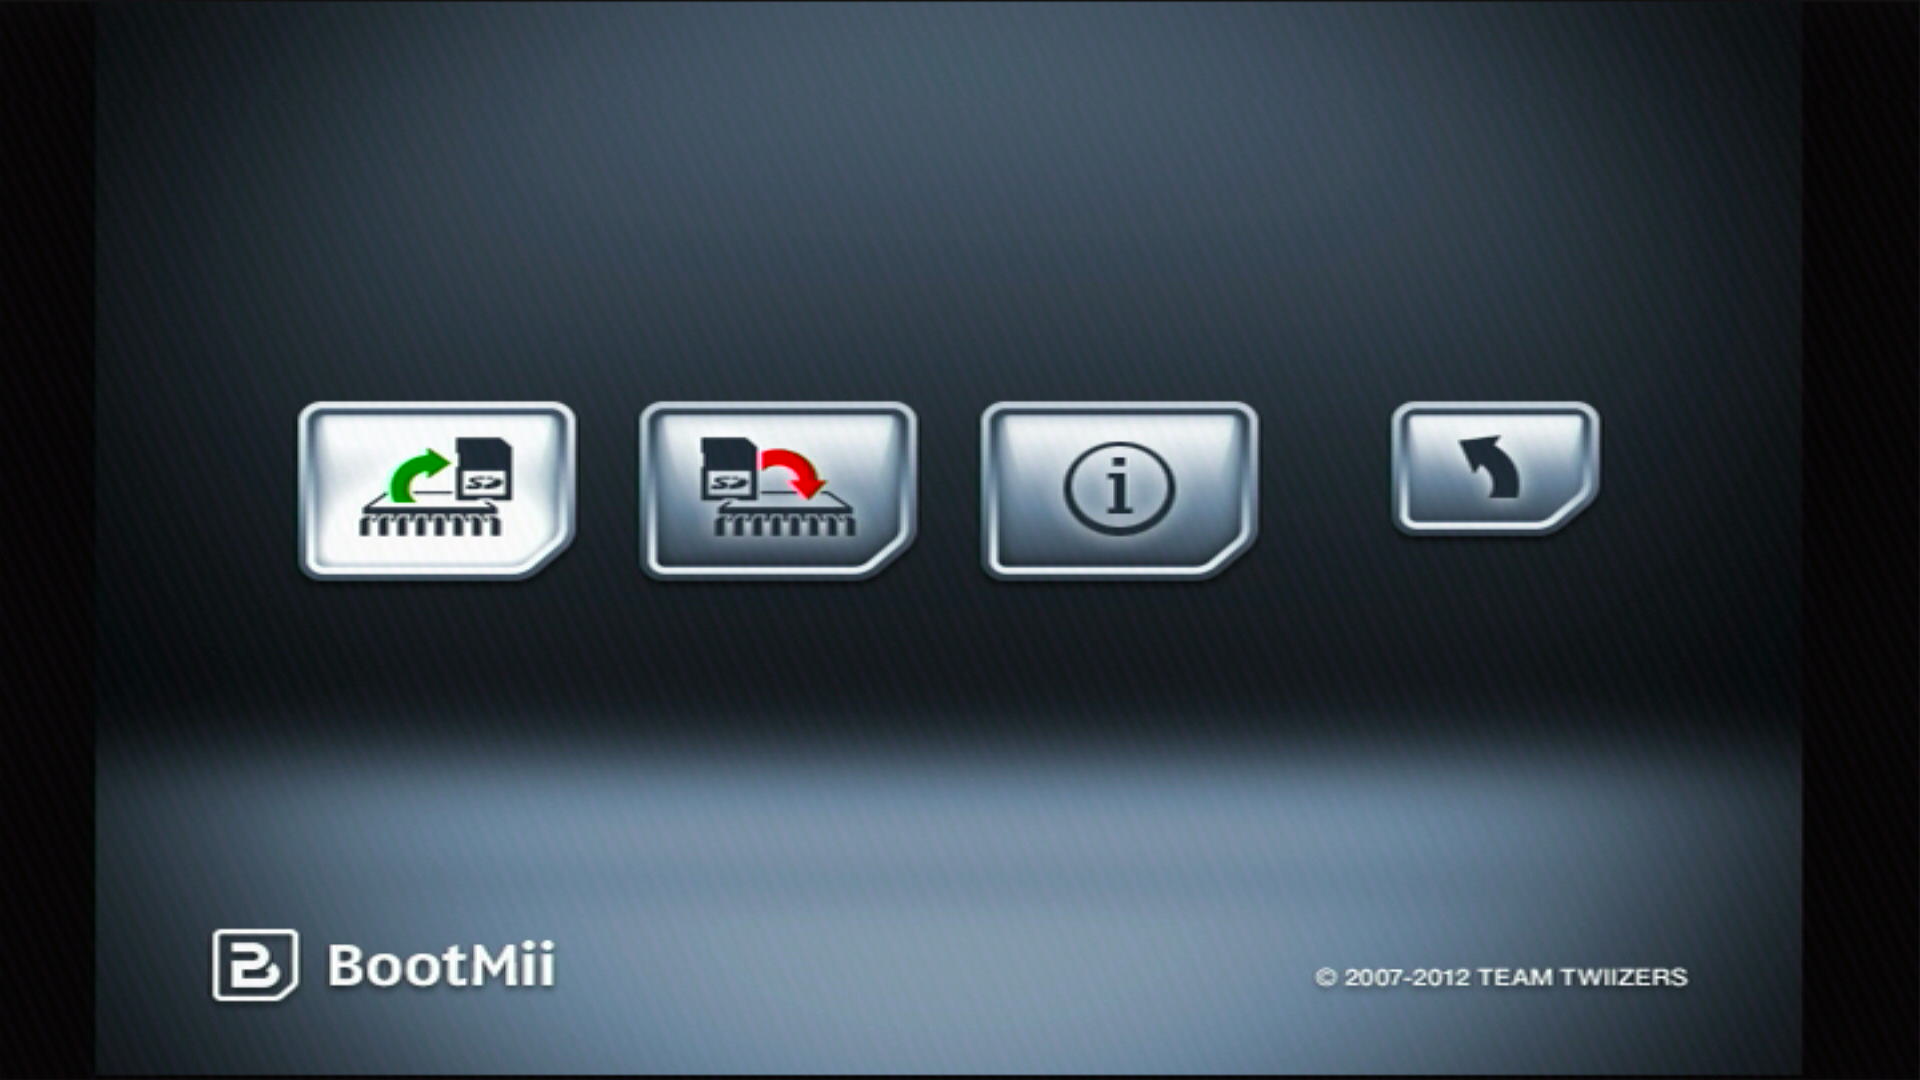
Select the first button to the left.
A NAND backup will start. You can watch the progress on the screen.
- "Bad Blocks" are normal, and mostly originate from the factory due to NAND binning. Don't worry when you see some on a NAND backup.
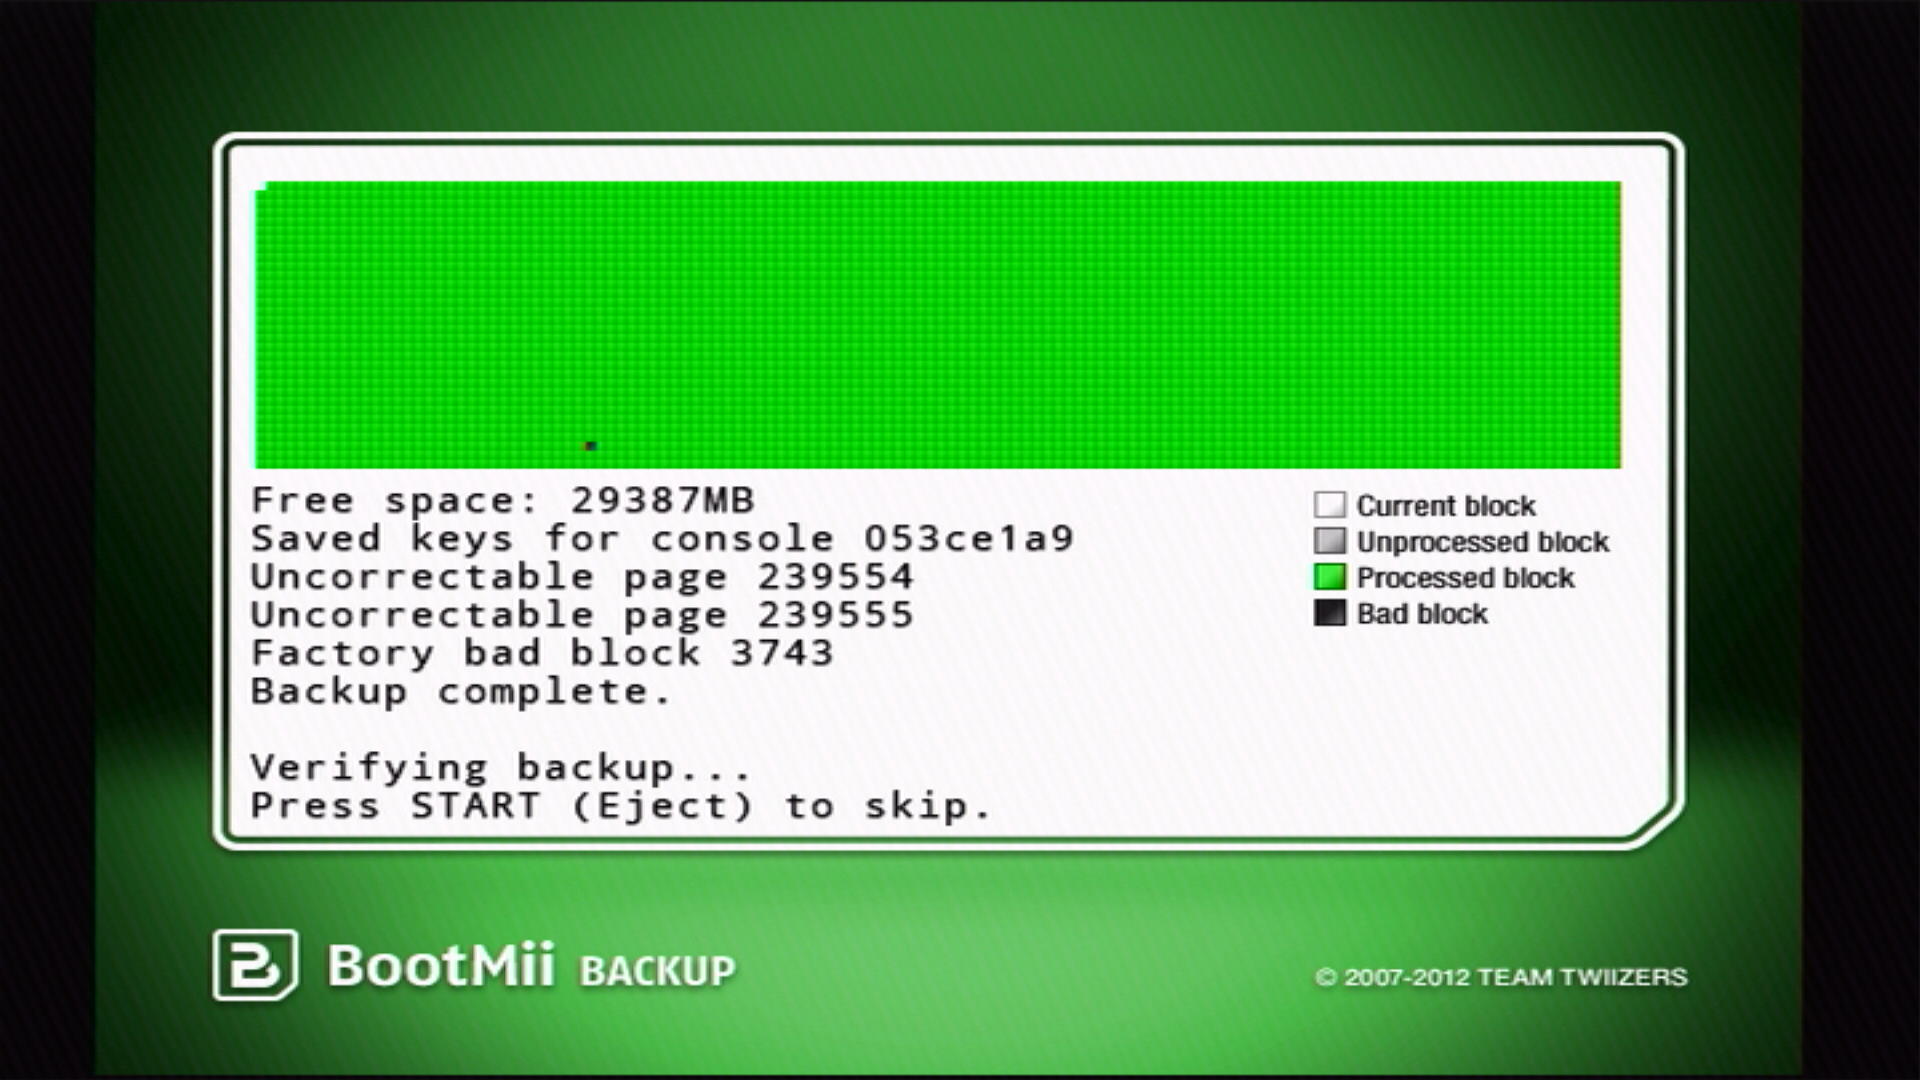
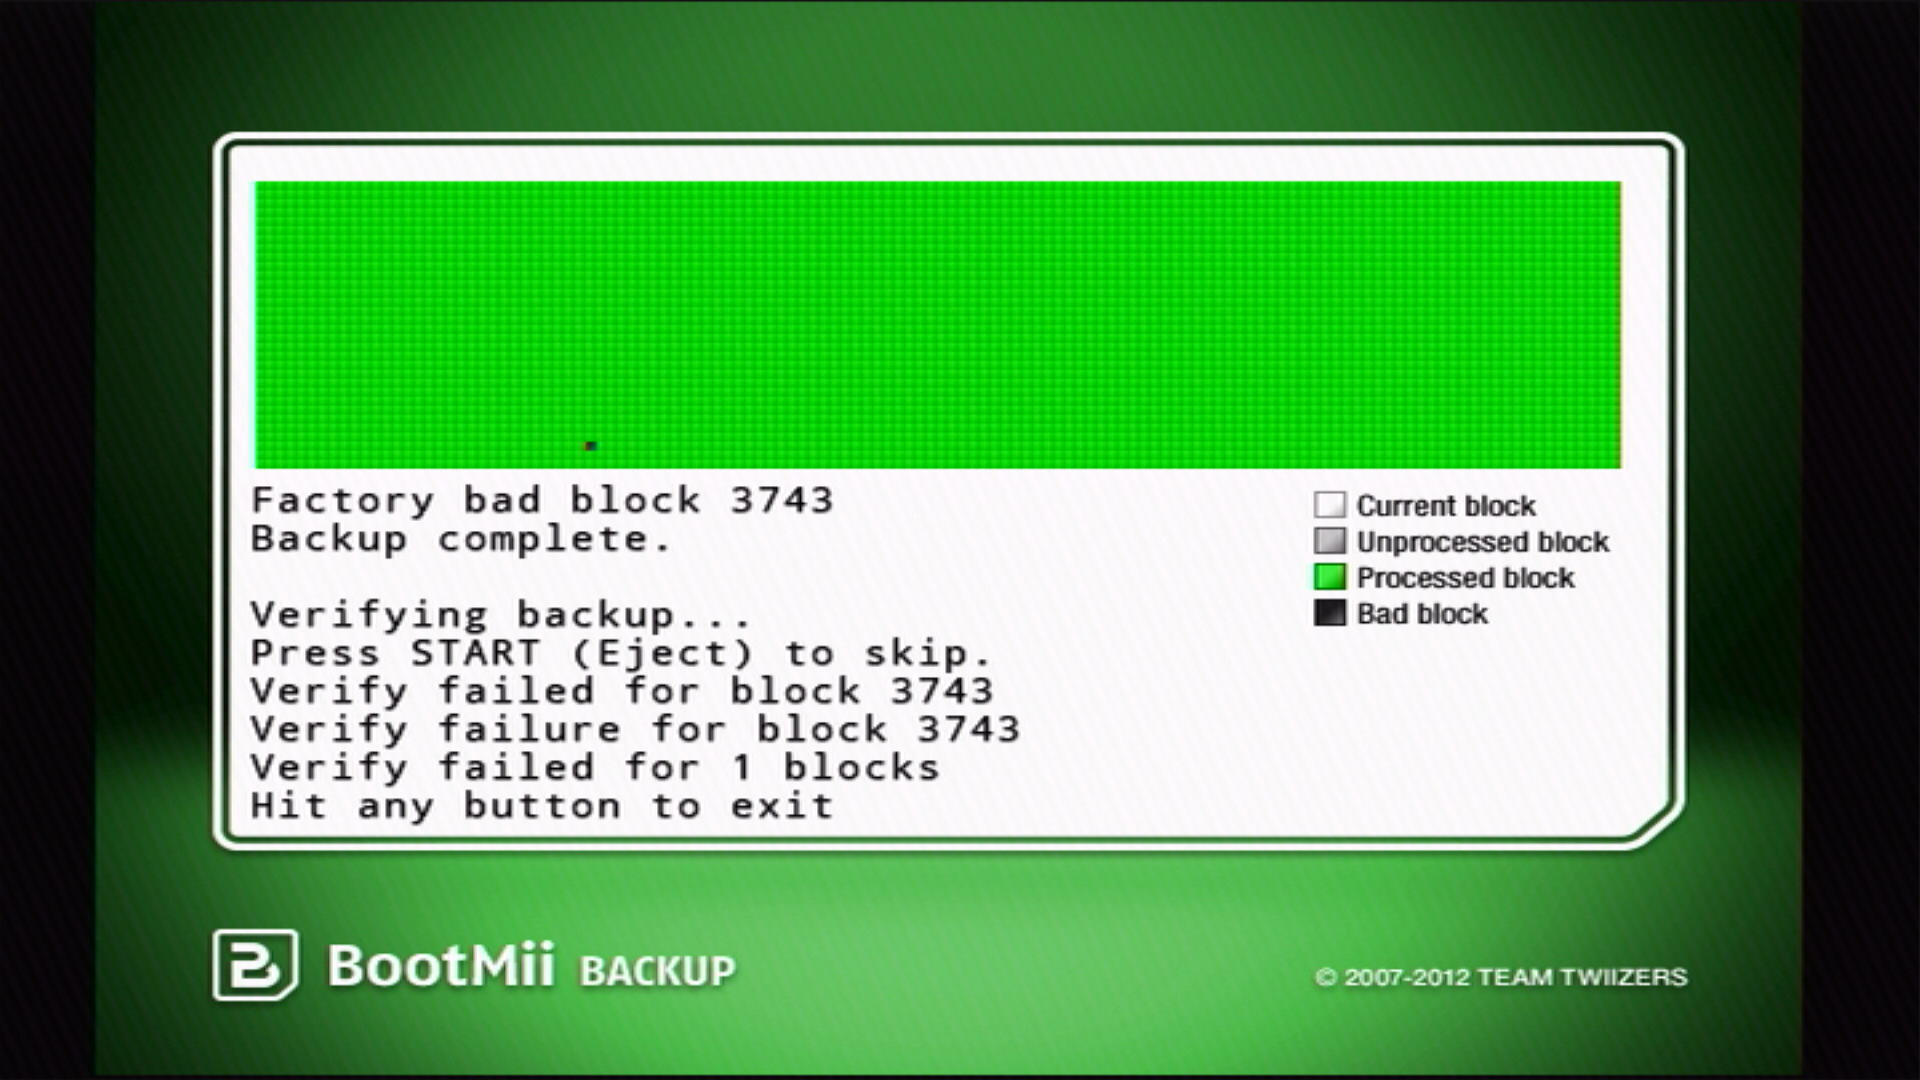
After the previous step completes, BootMii will verify the backup. Ideally, all the blocks should be green after the verification process.
- If you have factory bad blocks with uncorrectable pages, these blocks may fail to verify. As long as all non-bad blocks are successfully verified, this should be fine.
Press the Back button (the one with an arrow), then press either the Wii Menu button or the Homebrew Channel button to exit BootMii.

TIP
Continue to Priiloader Installation
Priiloader adds a secondary level of brick protection, and is highly recommended even if BootMii was installed as boot2. It is especially important for users of BootMii on IOS.